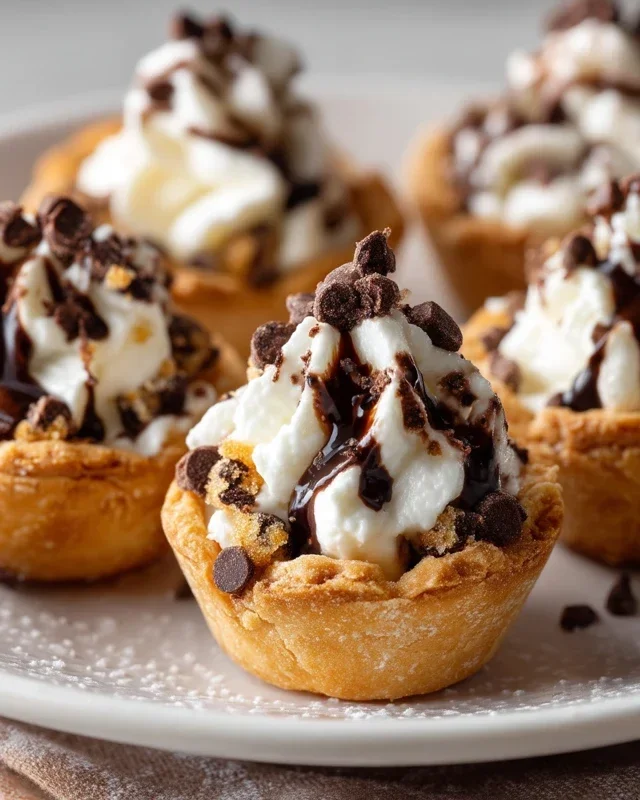
Mini Cannoli Cups-Easy Dessert Recipe
Mini cannoli cups are the answer to your sweet cravings, delivering all the iconic, delightful flavors of a classic cannoli in perfectly portioned, bite-sized packages. Who can resist that irresistible combination of crisp, golden pastry shells and a creamy, sweet ricotta filling, often kissed with hints of citrus and chocolate? These miniature marvels are not just visually appealing; they offer a delightful textural contrast that’s truly addictive. We love them because they’re surprisingly easy to make at home, allowing us to enjoy this beloved Italian treat without the fuss of traditional cannoli tubes. The magic of mini cannoli cups lies in their adaptability – you can customize the filling, add your favorite toppings, and serve them at any gathering, from elegant parties to casual get-togethers. Get ready to impress yourself and your loved ones with these charming mini cannoli cups!
Mini Cannoli Cups
Cannoli are a classic Italian dessert, known for their crispy shells and creamy, sweet filling. While traditional cannoli require a bit of finesse to shape and fry, these Mini Cannoli Cups offer a delightful shortcut to enjoying those iconic flavors. We’re taking inspiration from the beloved cannoli and reimagin extracting it in a wonderfully easy-to-make format using readily available ingredients. These little cups are perfect for parties, a sweet afternoon treat, or whenever that craving for something special strikes. Forget the rolling pins and deep fryers; these mini delights are achievable for any home baker. The beauty of this recipe lies in its simplicity and the incredible flavor payoff. You get all the deliciousness of cannoli – the rich ricotta, the hint of citrus, the sweet vanilla, and the satisfying crunch – in a bite-sized package that’s incredibly satisfying.
Ingredients:
Instructions:
1. Prepare the Creamy Ricotta Filling:
The heart of any cannoli is its filling, and ours is no exception. Start by ensuring your ricotta cheese is well-drained. This is a crucial step to prevent a watery filling. You can drain it by lining a fine-mesh sieve with cheesecloth or a coffee filter, placing the ricotta on top, and letting it sit over a bowl in the refrigerator for at least an hour, or even overnight. Once drained, transfer the ricotta to a medium bowl. Add the powdered sugar, granulated sugar, your chosen citrus zest (orange or lemon both work beautifully to add a bright, fresh note), and vanilla extract. Gently stir everything together until it’s well combined and smooth. Don’t overmix, as you want to maintain some texture from the ricotta. Taste and adjust sweetness if needed. Cover the bowl and refrigerate the filling while you prepare the pastry cups. This allows the flavors to meld together beautifully.
2. Crafting the Crispy Cups:
Now for the “cups” themselves! Unroll your softened refrigerated pie crusts onto a lightly floured surface. Using a round cookie cutter or the rim of a glass that’s about 3 inches in diameter, cut out as many circles as you can from each pie crust. You’ll likely get around 10-12 circles per crust, so aim for roughly 20-24 circles in total. Gather the scraps, re-roll them gently (try not to overwork the dough), and cut out more circles. Carefully press each dough circle into the wells of a mini muffin tin. Don’t stretch the dough too much; gently press it down so it lines the bottom and sides of the muffin cup. You want to create a small “cup” shape that will hold the filling. Ensure the edges of the dough come up slightly over the rim of the muffin tin to create a defined cup.
3. Baking the Golden Cups:
Preheat your oven to 375°F (190°C). In a small bowl, mix together the turbinado sugar and ground cinnamon. This is your crunchy, spiced coating. Lightly brush the inside of each unbaked pastry cup with a tiny bit of water. This helps the sugar mixture adhere. Then, sprinkle a generous amount of the turbinado sugar and cinnamon mixture into each cup, ensuring it coats the bottom and sides. This not only adds a delicious crunch and flavor but also gives the cups a beautiful golden-brown hue as they bake. Place the muffin tin in the preheated oven and bake for 12-15 minutes, or until the edges of the pastry cups are golden brown and slightly crisp. Keep a close eye on them as ovens can vary. You want them cooked through and nicely browned, but not burnt.
4. Cooling and Filling the Cups:
Once baked to perfection, carefully remove the muffin tin from the oven. Let the pastry cups cool in the tin for about 5 minutes. This allows them to firm up slightly. Then, carefully invert the muffin tin over a wire rack to release the mini cannoli cups. They should pop out easily. If any stick, gently run a thin knife around the edges. Allow the cups to cool completely on the wire rack. This is important; if you fill them while they are still warm, the filling will melt and become runny. While they are cooling, you can prepare your garnishes. If you’re using chocolate chips, you might want to chop them slightly finer if they are very large. If using pistachios, ensure they are finely chopped for a delicate texture.
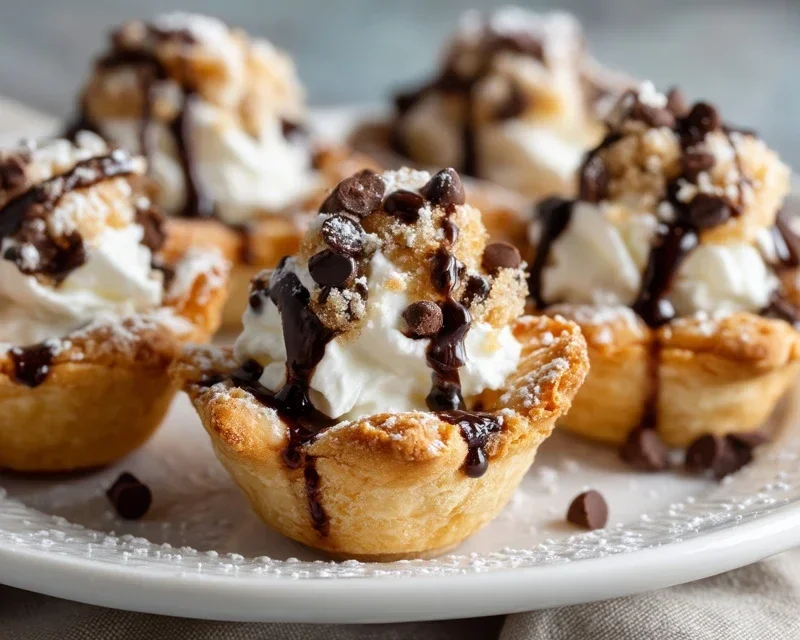
5. Assembling Your Mini Cannoli Cups:
Once the pastry cups are completely cool, it’s time for the best part – filling them! Spoon or pipe the chilled ricotta filling into each cooled pastry cup. You can use a spoon for a rustic look, or for a more polished finish, transfer the filling to a piping bag fitted with a round tip. Don’t overfill them; aim for a generous but manageable amount. Finally, garnish the tops of your mini cannoli cups. Sprinkle them with the miniature semisweet chocolate chips or the finely chopped pistachios. For a final touch of sweetness and elegance, dust them generously with additional powdered sugar just before serving. These mini cannoli cups are best enjoyed the same day they are assembled to ensure the shells remain as crisp as possible. Enjoy your homemade Italian-inspired treats!
Conclusion:
There you have it – your guide to creating these absolutely delightful Mini Cannoli Cups! I truly believe this recipe is fantastic because it captures all the classic, irresistible flavors of traditional cannoli in a perfectly portioned, wonderfully easy-to-manage format. The crisp, buttery shells paired with the creamy, sweet ricotta filling are a match made in dessert heaven. They’re elegant enough for a special occasion yet simple enough for a weeknight treat.
These mini wonders are incredibly versatile. Serve them as a delightful ending to an Italian feast, a charming addition to a dessert buffet, or simply as a sweet pick-me-up with your afternoon coffee. For a touch of flair, consider drizzling them with a little melted chocolate or dusting them with edible glitter. Thinking about variations? Feel free to add a pinch of cinnamon or a dash of orange zest to the filling for a twist, or even swap out some of the ricotta for cream cheese for a richer texture. I wholeheartedly encourage you to give these Mini Cannoli Cups a try; I promise you won’t be disappointed!
Frequently Asked Questions:
Can I make the cannoli shells ahead of time?
Yes, you absolutely can! Once cooled and completely dry, the baked shells can be stored in an airtight container at room temperature for up to 2-3 days. It’s best to fill them closer to serving time to ensure their crispness.
How should I store the filled mini cannoli cups?
For the best texture, it’s recommended to fill the cannoli cups just before serving. However, if you need to store them, place them in an airtight container in the refrigerator for no more than a few hours. The shells will soften slightly, but they’ll still be delicious.
What are some other filling ideas besides the classic ricotta?
You can get creative! Consider a chocolate chip ricotta filling, a mascarpone filling with a hint of lemon zest, or even a dairy-free version using cashew cream. Some people also enjoy adding finely chopped pistachios or candied fruit to the standard ricotta mix.
Mini Cannoli Cups
Delightful mini cannoli cups featuring a creamy ricotta filling and a crisp, spiced crust, perfect for a sweet treat.
Ingredients
-
1 container whole-milk ricotta cheese (15 oz., drained)
-
1/2 cup powdered sugar
-
2 tablespoons granulated sugar
-
1 teaspoon finely grated orange zest
-
1/2 teaspoon vanilla extract
-
1 box refrigerated pie crusts, softened as directed on box (2 count )
-
3 tablespoons turbinado sugar
-
1 teaspoon ground cinnamon
-
1/4 cup miniature semisweet chocolate chips
-
additional powdered sugar, for dusting
Instructions
-
Step 1
Preheat oven to 375°F (190°C). Lightly grease muffin tins. -
Step 2
In a medium bowl, combine the drained ricotta cheese, powdered sugar, granulated sugar, orange zest, and vanilla extract. Stir until smooth and well combined. -
Step 3
Unroll the refrigerated pie crusts. Using a round cookie cutter (about 2.5 inches in diameter), cut out circles from the pie crusts. -
Step 4
Gently press the pie crust circles into the greased muffin tin cups, forming small shells. -
Step 5
Bake for 8-10 minutes, or until the crusts are golden brown and slightly crisp. -
Step 6
While the crusts are still warm, carefully remove them from the muffin tins and let them cool completely on a wire rack. -
Step 7
In a small bowl, mix together the turbinado sugar and ground cinnamon. -
Step 8
Once the cannoli cups are completely cooled, fill them with the ricotta mixture using a spoon or piping bag. Sprinkle with miniature chocolate chips. -
Step 9
Dust with additional powdered sugar before serving.
Important Information
Nutrition Facts (Per Serving)
It is important to consider this information as approximate and not to use it as definitive health advice.
Allergy Information
Please check ingredients for potential allergens and consult a health professional if in doubt.