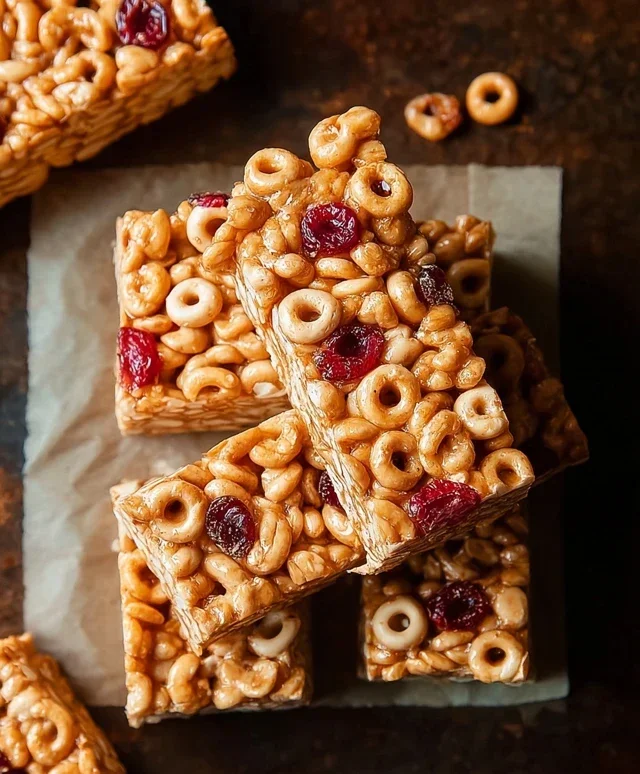
Easy Cereal Bars – Quick Homemade Treat Recipe
Cereal bars are a true pantry superhero, aren’t they? They’re the ultimate grab-and-go solution, the answer to that mid-afternoon slump, and a delightful way to repurpose those last few bowls of your favorite breakfast grains. What is it about these simple yet satisfying treats that makes us reach for them again and again? Perhaps it’s the perfect balance of sweet and crunchy, the sheer versatility in ingredients, or the comforting nostalgia they evoke. They’re incredibly forgiving, allowing you to swap out nuts, seeds, dried fruits, and even different types of cereal to create your own unique masterpiece. Whether you’re packing lunches, fueling a hike, or just craving a quick and wholesome bite, these cereal bars deliver every single time. Today, we’re diving into how to make some truly exceptional cereal bars that will become your new go-to recipe.
No-Bake Cereal Bars: Your Go-To Snack Solution
Let’s be honest, sometimes the best snacks are the ones that require minimal fuss and maximum deliciousness. That’s where these no-bake cereal bars shine. They’re incredibly versatile, allowing you to customize them with your favorite cereal, and they come together in a matter of minutes. Perfect for busy mornings, after-school refueling, or a satisfying sweet treat, these bars are a game-changer. Forget complicated baking; we’re talking simple mixing and chilling. I love having these on hand because they’re so easy to whip up when a craving strikes or when unexpected guests pop by. Plus, they’re a fantastic way to use up that last bit of cereal lingering in the box.
Ingredients:
Let’s Get Mixing!
This is where the magic happens, and it’s surprisingly simple. First things first, prepare your pan. I like to line an 8×8 inch baking dish with parchment paper, leaving a little overhang on the sides. This makes it so much easier to lift the bars out later without any sticking. If you don’t have parchment paper, you can lightly grease the dish, but parchment is truly your best friend here.
Now, let’s get down to business with our core ingredients. In a large mixing bowl, add your 3 cups of cereal. The type of cereal you choose will dramatically impact the final flavor and texture of your bars. Crispy rice cereal will give you a lighter, crispier bar, while something like granola or even crushed cornflakes will offer a heartier, chewier experience. Feel free to mix and match for a unique flavor profile!
Next, we’re going to melt our binder. In a microwave-safe bowl or a small saucepan over low heat, gently warm your 2/3 cup of peanut butter (or your chosen nut butter) and your 1/2 cup of liquid sweetener (agave, honey, or brown rice syrup). You want these to be well combined and pourable, but not boiling hot. Stir them together until smooth. If you’re using a microwave, heat in 30-second intervals, stirring in between, until everything is nicely melted and incorporated. The goal is a smooth, glossy mixture that will coat your cereal. Be careful not to overheat, as this can make the mixture too thin and harder to work with.
Now for the optional, but highly recommended, additions. If you’re looking to boost the protein content of your bars, stir in your 3 tablespoons of protein powder into the melted peanut butter and sweetener mixture. Whisk it in thoroughly to ensure there are no clumps. This is a great way to make these bars more of a filling snack or a pre/post-workout treat. If you like a little contrast in sweetness, you can also add the 1/2 teaspoon of salt at this stage. It really helps to balance out the sweetness and enhance the flavors of the other ingredients.
Once your binder is smooth and ready, pour it over the cereal in your large mixing bowl. Using a sturdy spatula or a wooden spoon, gently but thoroughly mix everything together. You want to ensure that every single piece of cereal is coated with the sticky peanut butter mixture. This might take a minute or two of patient stirring. Don’t be afraid to get in there and make sure all the dry bits are covered. This coating is what holds our bars together, so a good coating is key!
Pressing and Chilling
Now that everything is beautifully coated, it’s time to get it into our prepared pan. Pour the cereal mixture into the 8×8 inch baking dish. Using your spatula, or even the back of a measuring cup that you’ve lightly greased or dampened, firmly press the mixture into the pan. The key here is to press down hard. You want to compact the cereal mixture as much as possible. This will ensure that your bars hold their shape and don’t crum extractble apart when you cut them. Take your time with this step; a well-pressed bar is a sturdy bar.
Once you’ve pressed the mixture down evenly and firmly, it’s time for the chilling phase. Cover the pan with plastic wrap or foil, and place it in the refrigerator. You’ll want to let these bars chill for at least 1 to 2 hours. This chilling time is crucial for allowing the peanut butter and sweetener mixture to firm up and bind everything together. The longer they chill, the firmer they will become. I often leave mine in for a few hours, or even overnight, if I have the patience!
Cutting and Enjoying
After the chilling period, your cereal bars should be firm enough to handle. This is where the parchment paper overhang comes in handy. Lift the entire block of cereal mixture out of the pan using the parchment paper. Place it on a cutting board. Now, using a sharp knife, cut the block into your desired bar shapes. You can make them thick and chunky or thinner and more delicate, depending on your preference. Wiping your knife clean between cuts can help you achieve neater edges.
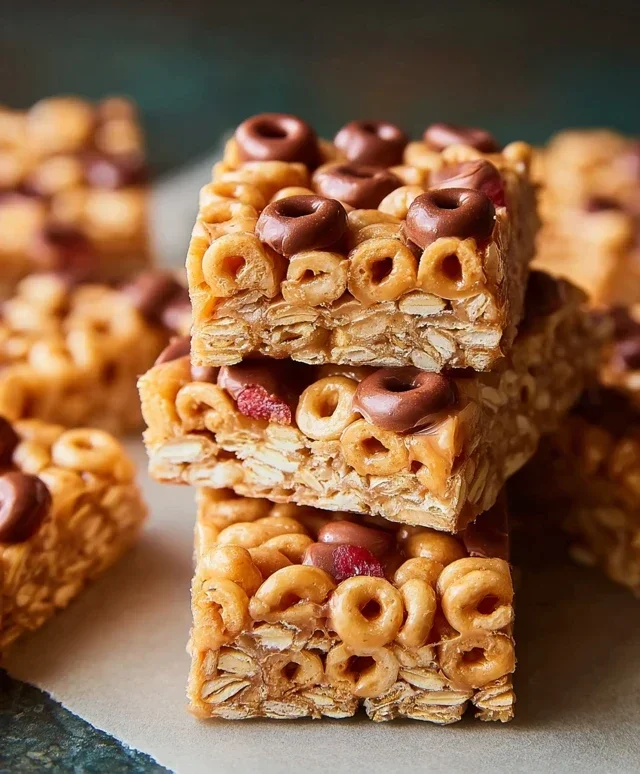
And there you have it – homemade, no-bake cereal bars! These are best stored in an airtight container in the refrigerator to maintain their firmness. They’ll typically last for about a week. Enjoy them as is, or get creative with add-ins like chocolate chips, dried fruit, or chopped nuts before pressing them into the pan for even more flavor and texture!
Conclusion:
I hope you’ve enjoyed learning how to make these fantastic cereal bars! This recipe is a true winner because it’s incredibly versatile, satisfyingly chewy, and can be whipped up with minimal fuss. They’re perfect for a quick breakfast on the go, a post-workout snack, or even a healthier treat to satisfy your sweet tooth. The beauty of these cereal bars lies in their adaptability – you can truly make them your own!
Some of my favorite serving suggestions include enjoying them with a glass of cold milk, crum extractbling them over yogurt, or even as a base for a no-bake cheesecake. When it comes to variations, the possibilities are endless! Feel free to add a handful of your favorite nuts, dried fruits like cranberries or apricots, or even a sprinkle of cinnamon or cocoa powder for a flavor boost. Don’t be afraid to experiment and discover your own perfect combination!
I highly encourage you to give this cereal bar recipe a try. It’s a simple yet rewarding baking project that delivers delicious results every time. Let me know in the comments if you try it and what fantastic variations you come up with!
Frequently Asked Questions:
Q: How long do these cereal bars typically last?
A: Stored in an airtight container at room temperature, these cereal bars should stay fresh for about 5-7 days. For longer storage, you can refrigerate them, which can extend their shelf life to about 2 weeks.
Q: Can I make these cereal bars vegan?
A: Absolutely! You can easily make these cereal bars vegan by substituting the butter with a vegan butter alternative or coconut oil. Ensure your chosen cereal is also vegan, as some contain honey or dairy.
Q: My bars are crum extractbling. What did I do wrong?
A: Crum extractbling often happens if the mixture isn’t pressed down firmly enough in the pan or if there isn’t enough binder. Make sure you really pack the mixture tightly into the pan, and if you find your mixture is too dry, you might need a little extra honey or syrup to help it bind.
Easy Cereal Bars
Quick and simple cereal bars made with your favorite cereal, nut butter, and sweetener. Perfect for a grab-and-go snack.
Ingredients
-
3 cups cereal of choice
-
2/3 cup peanut butter or nut butter of choice
-
1/2 cup agave, honey, or brown rice syrup
-
1/2 tsp salt (optional)
-
3 tbsp protein powder (optional)
Instructions
-
Step 1
Line an 8×8 inch baking dish with parchment paper, leaving an overhang on the sides. -
Step 2
In a large bowl, combine the cereal, peanut butter (or nut butter of choice), agave (or honey, or brown rice syrup), and optional salt and protein powder. -
Step 3
Mix thoroughly until all ingredients are well combined and the cereal is coated. -
Step 4
Press the mixture firmly and evenly into the prepared baking dish. -
Step 5
Chill in the refrigerator for at least 30 minutes to allow the bars to set. -
Step 6
Lift the parchment paper out of the dish and cut into bars.
Important Information
Nutrition Facts (Per Serving)
It is important to consider this information as approximate and not to use it as definitive health advice.
Allergy Information
Please check ingredients for potential allergens and consult a health professional if in doubt.