Easy Homemade English Muffins – Soft & Delicious Recipe
Easy Homemade English Muffins are about to become your new breakfast obsession. Forget those cellophane-wrapped imposters from the grocery store; we’re talking about real, honest-to-goodness English muffins, baked in your own kitchen, bursting with nooks and crannies just beggin extractg for butter and jam. There’s something incredibly satisfying about pulling a warm, golden-brown English muffin fresh from the pan, isn’t there? It’s a comfort food that evokes childhood memories and promises a delicious start to any day. What makes these easy homemade English muffins so special? It’s the perfect balance of chewy interior and slightly crisp exterior, achieved with simple ingredients and a straightforward process. I’ve always loved the versatility of a good English muffin – whether it’s for a classic breakfast sandwich, slathered with cream cheese, or as a base for eggs Benedict, it never disappoints. This recipe is designed to be incredibly accessible, even if you’re new to baking.

Easy Homemade English Muffins
There’s something incredibly satisfying about a warm, freshly made English muffin, split open and toasted to perfection. While store-bought ones are convenient, nothing compares to the tender crum extractb and delightful nooks and crannies of a homemade version. The good news? Making them yourself is surprisingly easy and requires just a few simple ingredients you likely already have in your pantry. Forget the complicated kneading and long proofing times; this recipe is designed for busy home bakers who crave that authentic English muffin experience. Get ready to impress yourself and your loved ones with these delightful breakfast treats.
Ingredients:
Instructions:
1. Activating the Yeast and Mixing the Dough:
In a large mixing bowl, combine the warm water and sugar. Give it a gentle stir to dissolve the sugar. Now, sprinkle the instant dry yeast over the surface of the water. You don’t need to stir it in just yet. Let it sit for about 5-10 minutes. You’ll know the yeast is active and ready to go when you see a frothy, bubbly layer on top of the water. This “blooming” process is crucial for ensuring your muffins will rise beautifully. Once you see that foamy magic, add the oil (or melted butter) to the bowl. Next, add the flour and salt. If you’re using a stand mixer with a dough hook, start mixing on low speed until the ingredients just come together. If you’re mixing by hand, use a sturdy spoon or spatula to incorporate everything. The dough will be quite shaggy and sticky at this stage, which is perfectly normal. If it feels excessively wet and you’re struggling to bring it together, you can gradually add that extra ¼ cup of flour, a tablespoon at a time, until the dough is manageable.
2. Developing the Dough (No Knead Method):
This recipe employs a “no-knead” approach, making it incredibly begin extractner-friendly. Once the ingredients are mostly combined, continue mixing in your stand mixer on medium speed for about 5-7 minutes. If you’re mixing by hand, you’ll want to work the dough in the bowl for about 8-10 minutes. Don’t worry about traditional kneading techniques; you’re essentially just developing the gluten structure. You’ll notice the dough becoming smoother and more elastic as you mix. It should still be slightly sticky, but it should pull away from the sides of the bowl. The key here is consistent mixing rather than vigorous kneading. This gentle agitation is enough to create those desirable airy pockets in your finished muffins.
3. First Rise and Shaping:
Lightly grease the mixing bowl you used, or transfer the dough to a lightly oiled clean bowl. Cover the bowl tightly with plastic wrap or a damp kitchen towel. Find a warm, draft-free spot in your kitchen for the dough to rise. A slightly warmed oven (turned off, of course!) or a spot near a sunny window works well. Let the dough rise for about 1 to 1.5 hours, or until it has roughly doubled in size. It should look visibly puffier and airy. Once risen, gently punch down the dough to release the air. Turn the dough out onto a lightly floured surface. Here’s where we get ready to shape them. You can gently pat the dough into a rectangle about ½-inch thick. Use a 3-inch round biscuit cutter or a glass to cut out your muffin rounds. You should aim for about 8-10 muffins, depending on your cutter size. Don’t overwork the dough at this stage. As you cut out your rounds, gather the scraps, gently re-form them into a disc, and cut out more muffins.
4. Second Rise and Preparing for Cooking:
This is where we prepare our cut-out dough rounds for cooking. You’ll need baking sheets lined with parchment paper. Generously dust each piece of parchment paper with cornmeal. The cornmeal is essential for that classic English muffin texture and to prevent sticking. Carefully place your cut-out dough rounds onto the prepared baking sheets, leaving a little space between each one. Now, and this is crucial for those perfect nooks and crannies, let the shaped muffins rest and rise for another 30-45 minutes. They won’t double in size like the first rise, but they should become noticeably puffier and a bit softer to the touch. While they’re having their second rise, prepare your cooking surface.
5. Griddling the Muffins:
This step is key to achieving that characteristic golden-brown crust and tender interior. You have a couple of options here. The most traditional method is to use a griddle or a large non-stick skillet over medium-low heat. Add a good tablespoon or two of cornmeal to the griddle and spread it around. You want enough to coat the surface evenly and give the muffins something to cook on. Alternatively, you can use a lightly oiled baking sheet placed on a stovetop burner set to medium-low heat. Carefully place the risen muffin rounds onto the preheated griddle or baking sheet, making sure not to overcrowd the pan. Cook them for about 4-6 minutes per side. You’re looking for a beautiful golden-brown color and a firm, slightly springy texture. They should sound a little hollow when tapped. Resist the urge to turn up the heat; a lower, slower cook ensures they cook through evenly without burning the outside. Once they’re cooked on both sides, remove them from the griddle and place them on a wire rack to cool completely.
6. The Final Toast:
Once your English muffins have cooled, the best part awaits! Use a fork to gently split each muffin horizontally. This technique creates those wonderful nooks and crannies that are perfect for holding butter, jam, or your favorite toppings. Toast them in a toaster, toaster oven, or under the broiler until golden brown and wonderfully warm. Enjoy the fruits of your labor with your favorite breakfast spreads!
Conclusion:
There you have it – a simple yet incredibly rewarding recipe for easy homemade English muffins! What makes this recipe so fantastic is its accessibility. You don’t need any fancy equipment or a degree in baking to achieve those wonderfully nooks-and-crannies-filled, perfectly golden discs of deliciousness. They’re a far cry from the store-bought versions, offering a superior texture and flavor that will have you wondering why you ever bought them before. These are perfect for a leisurely weekend brunch, a quick breakfast on a busy weekday, or even as a base for a delightful savory sandwich.
Beyond the classic butter and jam, imagin extracte slathering these warm beauties with cream cheese and chives, or using them for eggs Benedict. For a sweet twist, try adding a touch of cinnamon or a handful of blueberries to the dough before cooking. Don’t be afraid to experiment! I truly encourage you to give this recipe a try; you’ll be so proud of yourself for creating such a bakery-quality treat in your own kitchen.
Frequently Asked Questions:
Can I make these ahead of time?
Absolutely! Once cooled, you can store your easy homemade English muffins in an airtight container at room temperature for 2-3 days, or freeze them for up to 2 months. Simply reheat them gently in a toaster or on a griddle when you’re ready to enjoy.
Why aren’t mine getting those classic nooks and crannies?
The nooks and crannies are often a result of a slightly wetter dough and proper cooking technique. Ensure your dough isn’t too stiff, and don’t overcrowd the pan while cooking. Allowing them to cook slowly on medium-low heat helps create that characteristic texture.
Can I use a different type of flour?
While this recipe is optimized for all-purpose flour, you could experiment with a blend of whole wheat flour for added fiber and a nuttier flavor. Be aware that you might need to adjust the liquid slightly as whole wheat flour absorbs moisture differently.
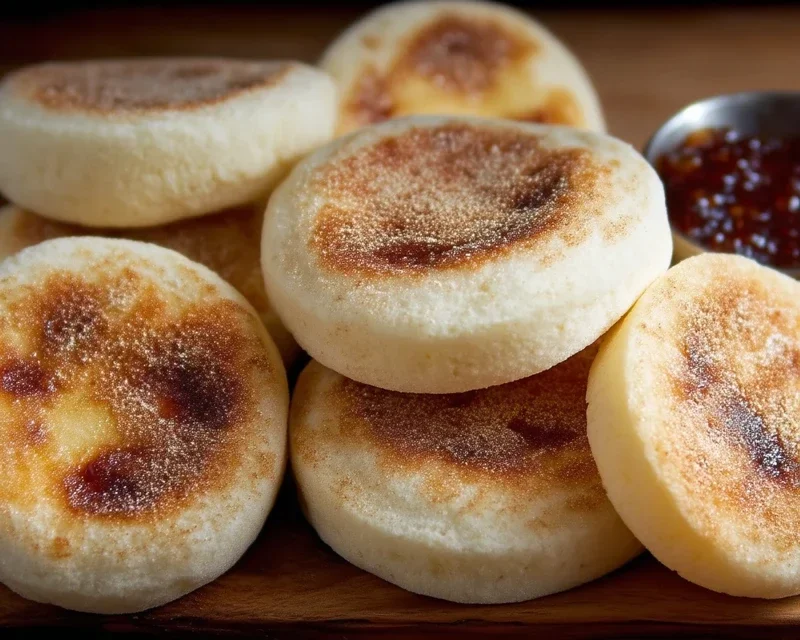
Easy Homemade English Muffins
Create delicious, fluffy English muffins from scratch with this easy recipe. Perfect for breakfast toast or breakfast sandwiches.
Ingredients
-
1 ¼ cups warm water
-
1 tablespoon sugar
-
1 teaspoon instant dry yeast
-
2 tablespoon oil
-
2 ¾ cups all purpose flour
-
1 teaspoon salt
-
cornmeal for dusting
Instructions
-
Step 1
In a large bowl, combine warm water and sugar. Sprinkle yeast over the top and let stand for 5-10 minutes until foamy. -
Step 2
Stir in the oil. -
Step 3
Add flour and salt to the bowl. Mix until a shaggy dough forms. Knead on a lightly floured surface for about 5-7 minutes until smooth and elastic, adding a little extra flour if needed. -
Step 4
Place the dough in a lightly oiled bowl, cover, and let rise in a warm place for about 1 hour, or until doubled in size. -
Step 5
Punch down the dough and divide it into 8 equal pieces. Shape each piece into a round disc, about ½ inch thick. Place on a baking sheet lined with parchment paper and dusted with cornmeal. Cover and let rise for another 30 minutes. -
Step 6
Heat a lightly oiled griddle or frying pan over medium heat. Cook the muffins for about 5-7 minutes per side, or until golden brown and cooked through. -
Step 7
Remove from the griddle and cool on a wire rack. Split with a fork and toast before serving.
Important Information
Nutrition Facts (Per Serving)
It is important to consider this information as approximate and not to use it as definitive health advice.
Allergy Information
Please check ingredients for potential allergens and consult a health professional if in doubt.