Cheesy Garlic Chicken Wraps- Easy & Delicious Recipe
Cheesy Garlic Chicken Wraps are about to become your new weeknight obsession. Imagin extracte tender, juicy chicken infused with the irresistible aroma of garlic, all bundled up in a warm tortilla with a blanket of gooey, melted cheese. What’s not to love? This dish hits all the right notes: it’s incredibly satisfying, bursting with flavor, and remarkably easy to whip up, making it a lifesaver after a long day. People adore these Cheesy Garlic Chicken Wraps because they deliver a comforting, restaurant-quality experience right in your own kitchen, without the fuss. It’s the perfect blend of savory, cheesy goodness that appeals to everyone, from picky eaters to seasoned foodies. Get ready to discover your new go-to for a quick, delicious, and utterly craveable meal.
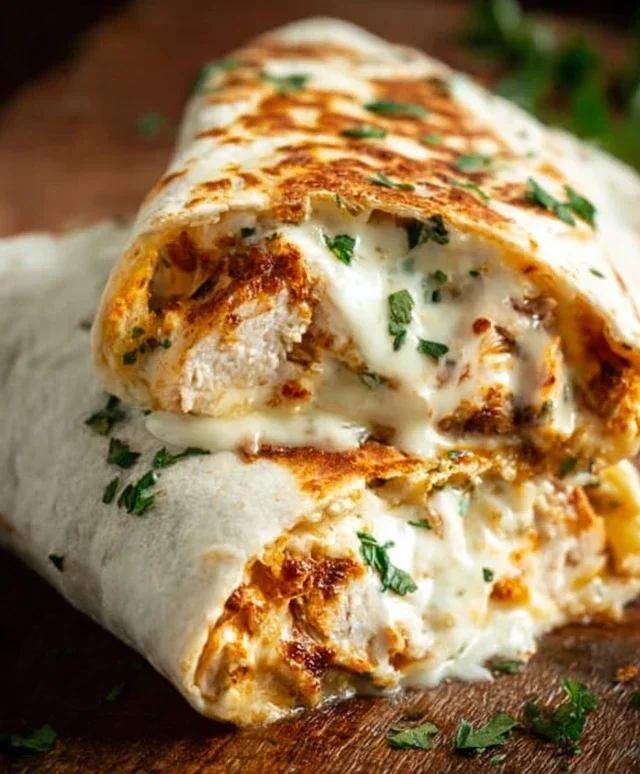
Cheesy Garlic Chicken Wraps
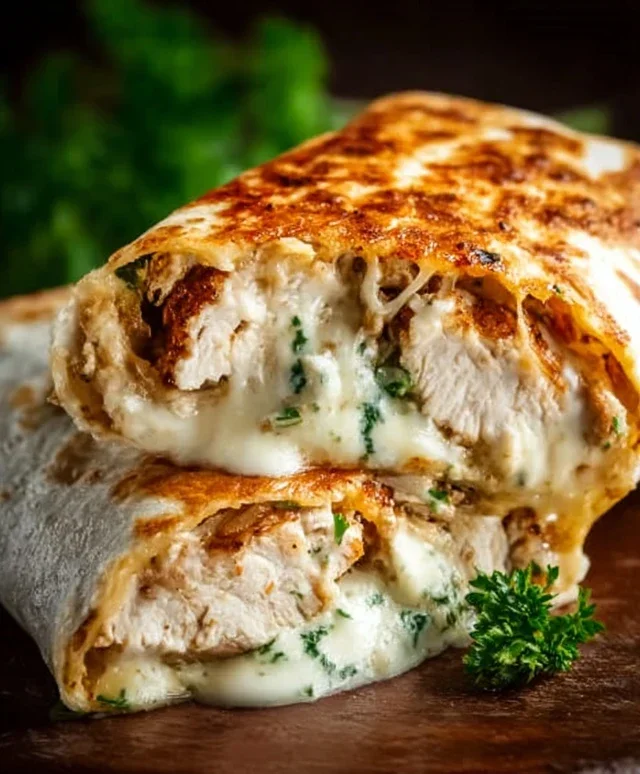
There’s something undeniably comforting and satisfying about a warm, flavorful wrap. And when that wrap is packed with tender chicken, a luscious cheesy garlic sauce, and perfectly toasted tortillas, it becomes a meal that’s hard to resist. These Cheesy Garlic Chicken Wraps are a weeknight dinner hero, a crowd-pleasing lunch option, or even a delightful appetizer if you make them smaller. They’re incredibly easy to prepare, making them a go-to when you’re short on time but still craving something delicious and homemade. The magic happens when simple ingredients come together to create a symphony of savory, creamy, and garlicky goodness.
The beauty of this recipe lies in its versatility. The cooked chicken can be rotisserie chicken picked up from the store for ultimate convenience, or you can grill or bake your own chicken breasts ahead of time. The shredded cheese melts into a gooey, irresistible filling, while the garlic permeates every bite with its pungent aroma and flavor. We’re not just talking about a sprinkle of garlic here; we’re infusing the chicken with garlic from the get-go and then enhancing it with garlic powder in the cheesy mixture. The optional smoked paprika adds a lovely depth and a hint of smokiness that complements the other flavors beautifully. Don’t skip the fresh parsley if you have it on hand – its bright, herbaceous notes cut through the richness of the cheese and add a pop of color. And the melted butter with that extra touch of garlic powder brushed on the tortillas before toasting? That’s the secret weapon that takes these wraps from good to absolutely spectacular, giving them a delightful golden-brown crispiness.
Let’s get started on creating these irresistible Cheesy Garlic Chicken Wraps!
Ingredients:
Cooking Instructions:
1.
Sautéing the Garlic and Seasoning the Chicken:
Begin extract by preparing your chicken filling. In a medium skillet, heat the 1 tablespoon of olive oil over medium heat. Once the oil is shimmering, add the 3 minced garlic cloves. Sauté the garlic for about 30-60 seconds, until it’s fragrant. Be careful not to burn the garlic, as this will make it taste bitter. Immediately add the 2 cups of cooked and shredded chicken to the skillet. Toss the chicken with the sautéed garlic, ensuring it’s evenly distributed. Now, it’s time to season generously. Sprinkle in the ½ teaspoon of salt, ¼ teaspoon of black pepper, ½ teaspoon of garlic powder, ½ teaspoon of onion powder, and the optional ½ teaspoon of smoked paprika. Stir everything together well, allowing the chicken to absorb these wonderful savory flavors. Cook for another 2-3 minutes, just to warm the chicken through and meld the seasonings. Remove the skillet from the heat and set aside.
2.
Creating the Creamy Cheesy Sauce:
In a separate bowl, combine the ½ cup of softened cream cheese, ½ cup of shredded mozzarella cheese, and ½ cup of shredded cheddar cheese. The cream cheese acts as a binder and provides an incredibly smooth and creamy base for our cheese sauce. The shredded mozzarella will melt beautifully, giving that characteristic gooey stretch, while the cheddar adds a sharp, tangy flavor that is simply irresistible. You can use a fork or a spatula to start mixing these cheeses together. Once they are somewhat combined, you’re going to add this mixture to the still-warm skillet that you used for the chicken (no need to wash it!). Place the skillet back over low heat. Stir the cheeses constantly. As the cheeses start to melt and combine with any residual chicken juices or flavors from the bottom of the pan, you’ll create a luscious, cheesy sauce. Continue to stir until the mixture is smooth and creamy, with no lumps of cream cheese remaining. This should only take a few minutes over low heat.
3.
Combining the Filling:
Now, it’s time to bring it all together. Add the seasoned chicken mixture from step 1 back into the skillet with the melted cheese sauce. Gently fold the chicken into the cheese mixture until it is completely coated. You want every piece of shredded chicken to be enveloped in that delicious, creamy, cheesy garlic goodness. If you’re using the optional 2 tablespoons of chopped fresh parsley, stir it in now. The parsley not only adds a lovely fresh flavor but also a beautiful vibrant green color that makes the filling look even more appealing. Stir just until the parsley is evenly distributed. Taste the filling at this point and adjust seasonings if necessary. You might want a pinch more salt or pepper depending on your preference. The filling should be thick and creamy, not watery.
4.
Preparing and Toasting the Tortillas:
Lay out your 4 large flour tortillas on a clean surface. In a small bowl, melt the 2 tablespoons of butter. Stir in the ½ teaspoon of garlic powder into the melted butter. This garlic butter is going to be our secret to perfectly golden and flavorful tortillas. Using a pastry brush or the back of a spoon, generously brush the garlic butter mixture onto one side of each tortilla. Make sure to get an even coating for consistent crispiness. Now, heat a large non-stick skillet or a griddle over medium heat. Carefully place one tortilla, buttered-side down, into the hot skillet. Cook for about 1-2 minutes, or until the bottom is golden brown and slightly crispy. You’ll see little bubbles forming. Flip the tortilla and cook the other side for another minute. You want them to be pliable enough to wrap but have a nice toasted texture. Remove from the skillet and repeat with the remaining tortillas, adding a little more butter if your pan gets dry.
5.
Assembling and Wrapping the Cheesy Garlic Chicken Wraps:
Once your tortillas are toasted and ready, it’s time to assemble the magic. Spoon about ¼ of the cheesy chicken filling onto the center of each toasted tortilla. Try to distribute it evenly. Fold in the sides of the tortilla first to create a neat envelope, and then tightly roll up from the bottom, tucking in the filling as you go. You want to create a compact wrap that holds all that deliciousness inside. If you prefer your wraps to stay closed, you can secure them with a toothpick or a strip of parchment paper. Serve immediately while they are warm and gooey. These Cheesy Garlic Chicken Wraps are fantastic on their own, but you can also serve them with your favorite sides like a fresh salad, some crispy tortilla chips, or a side of salsa or sour cream for dipping. Enjoy every cheesy, garlicky bite!
Conclusion:
There you have it – a straightforward and incredibly satisfying recipe for Cheesy Garlic Chicken Wraps! These wraps are a fantastic weeknight meal solution, offering a delightful balance of tender chicken, savory garlic, and gooey melted cheese, all bundled in a soft tortilla. I love how versatile they are, perfect for a quick lunch, a casual dinner, or even as a crowd-pleasing appetizer for game night. The simplicity of the ingredients and the speed of preparation make these Cheesy Garlic Chicken Wraps a winner in my kitchen, and I’m confident they will be in yours too. Don’t be afraid to experiment with different cheeses or add in some extra veggies to make them your own. Give these a try, and let me know how much you enjoy them!
Frequently Asked Questions:
Can I make the cheesy garlic chicken filling ahead of time?
Absolutely! You can prepare the cheesy garlic chicken filling a day in advance and store it in an airtight container in the refrigerator. When you’re ready to assemble your wraps, simply reheat the filling gently on the stovetop or in the microwave before stuffing your tortillas. This is a great way to save even more time on busy days.
What other vegetables can I add to my Cheesy Garlic Chicken Wraps?
The possibilities are endless! For added crunch and freshness, consider adding thinly sliced bell peppers (any color), shredded lettuce, chopped spinach, diced tomatoes, or even some pickled jalapeños for a spicy kick. Roasted vegetables like broccoli florets or caramelized onions also make delicious additions.
Are these wraps freezer-friendly?
While the cooked chicken filling freezes reasonably well, it’s best to assemble the wraps fresh for optimal texture. If you do choose to freeze them, it’s recommended to do so before adding any fresh, crisp vegetables. Thaw overnight in the refrigerator and reheat gently, adding any fresh components after warming.
Cheesy Garlic Chicken Wraps
Delicious and easy wraps filled with cheesy garlic chicken.
Ingredients
-
2 cups cooked and shredded chicken (rotisserie or grilled)
-
1 tablespoon olive oil
-
3 cloves garlic, minced
-
½ teaspoon salt
-
¼ teaspoon black pepper
-
½ teaspoon garlic powder
-
½ teaspoon onion powder
-
½ teaspoon smoked paprika (optional)
-
½ cup cream cheese, softened
-
½ cup shredded mozzarella cheese
-
½ cup shredded cheddar cheese
-
2 tablespoons chopped fresh parsley (optional)
-
4 large flour tortillas
-
2 tablespoons butter, melted
-
½ teaspoon garlic powder
Instructions
-
Step 1
In a skillet, heat olive oil over medium heat. Add minced garlic and cook until fragrant, about 1 minute. -
Step 2
Add the shredded chicken, salt, black pepper, garlic powder, onion powder, and smoked paprika (if using) to the skillet. Stir to combine and cook for 2-3 minutes. -
Step 3
Stir in the softened cream cheese until melted and well combined with the chicken mixture. Remove from heat. -
Step 4
Gently fold in the shredded mozzarella and cheddar cheeses, and chopped parsley (if using) until the cheeses are melted. -
Step 5
Warm the flour tortillas slightly. Spoon the chicken mixture evenly onto the center of each tortilla. -
Step 6
Fold in the sides of the tortillas and then roll them up tightly. -
Step 7
Brush the outside of each wrap with melted butter and sprinkle with an additional ½ teaspoon garlic powder. -
Step 8
Heat a clean skillet or griddle over medium heat. Cook the wraps for 2-3 minutes per side, or until golden brown and heated through.
Important Information
Nutrition Facts (Per Serving)
It is important to consider this information as approximate and not to use it as definitive health advice.
Allergy Information
Please check ingredients for potential allergens and consult a health professional if in doubt.