Easy Chicken Avocado Melt Sandwich Recipe
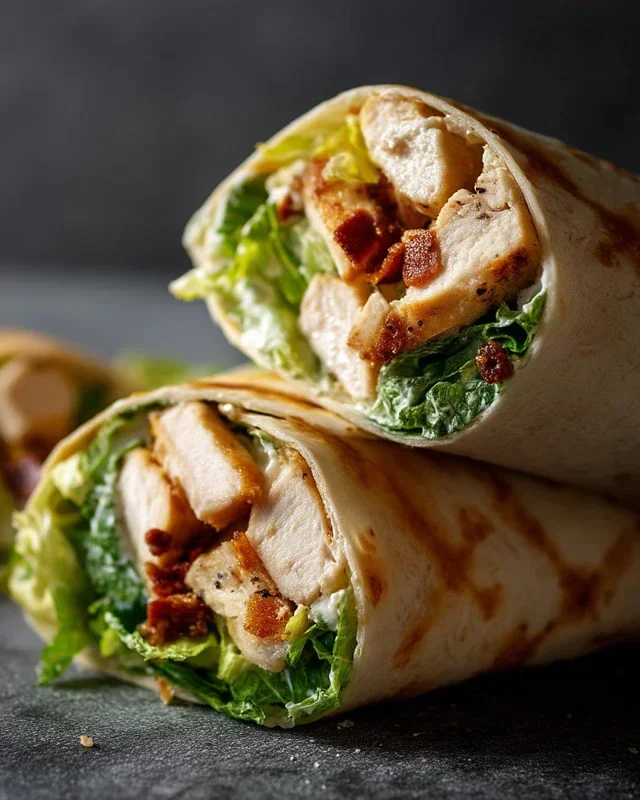
Chicken Avocado Melt Sandwich recipes are a go-to for a reason, offering a delightful combination of textures and flavors that satisfy cravings like no other. There’s something incredibly comforting and undeniably delicious about a perfectly grilled or toasted sandwich, and this particular creation elevates that classic with the creamy richness of avocado and savory chicken. It’s the kind of meal that feels both healthy and indulgent, making it a popular choice for a quick lunch, a light dinner, or even a satisfying weekend brunch. What truly makes the Chicken Avocado Melt Sandwich special is the harmonious balance: the tender chicken, the smooth, buttery avocado, the gooey, melted cheese, and the satisfying crunch of the bread. It’s a simple yet elegant dish that always hits the spot, and I’m thrilled to share my favorite way to bring this delightful sandwich to your table.
Why You’ll Love This Chicken Avocado Melt Sandwich
A Symphony of Flavors and Textures

Chicken Avocado Melt Sandwich
There’s something incredibly satisfying about a warm, gooey sandwich packed with delicious flavors. And when you combine tender chicken, creamy avocado, melted cheese, and a touch of zesty tang, you’ve got a winner in my book. This Chicken Avocado Melt Sandwich is the perfect meal for a quick lunch, a cozy dinner, or even a hearty breakfast. It’s simple enough to whip up on a busy weeknight but impressive enough to serve to guests. The beauty of this sandwich lies in its adaptability – feel free to swap out the cheese or bread to suit your personal preferences. But this classic combination, with the creamy avocado and perfectly cooked chicken, is a flavor explosion you won’t want to miss.
Let’s get started on creating this culinary delight!
Ingredients:
Cooking Instructions
Preparing the Chicken
The foundation of our delicious sandwich is perfectly cooked chicken. We want it tender, juicy, and seasoned beautifully.
Assembling the Sandwich
Now comes the fun part – bringin extractg all these wonderful ingredients together!
Grilling the Melts
The final step is to grill these beauties to golden-brown perfection and achieve that irresistible melted cheese.

Conclusion:
There you have it! This Chicken Avocado Melt Sandwich is an absolute winner. It’s a perfect blend of creamy avocado, tender chicken, and melted cheese, all brought together on perfectly toasted bread. It’s incredibly satisfying, surprisingly healthy, and so easy to whip up, making it ideal for a quick lunch, a casual dinner, or even a hearty breakfast. The combination of flavors and textures is truly delightful, and I’m confident you’ll find it as delicious as I do. Don’t hesitate to give this recipe a try – it’s a guaranteed crowd-pleaser!
For serving suggestions, this sandwich is fantastic on its own, but it also pairs beautifully with a side salad, a cup of tomato soup, or some crispy sweet potato fries. Feel free to get creative with variations too! You can add a sprinkle of red pepper flakes for a little heat, swap out the cheese for your favorite variety, or even use leftover roasted chicken for an extra depth of flavor. This Chicken Avocado Melt Sandwich is incredibly versatile!
Frequently Asked Questions:
Can I make the chicken ahead of time for this recipe?
Absolutely! Cooking the chicken in advance is a great way to save time. Once cooked and shredded or diced, you can store it in an airtight container in the refrigerator for up to 3 days. This makes assembling the sandwich even quicker on busy days.
What kind of bread works best for this sandwich?
While many breads work well, I find that heartier options like sourdough, whole wheat, or even a good quality ciabatta really hold up to the fillings and toast beautifully. The key is a bread that can stand up to being grilled or toasted without becoming soggy.
Is there a dairy-free or vegan alternative to this sandwich?
Yes, you can definitely adapt this recipe! For a dairy-free option, use your favorite plant-based cheese that melts well. For a vegan version, you could substitute the chicken with seasoned and pan-fried tofu or tempeh, and use plant-based cheese and mayonnaise. The avocado will still bring its wonderful creaminess!
Chicken Avocado Melt Sandwich
A flavorful and satisfying sandwich featuring tender chicken, creamy avocado, melted cheese, and fresh vegetables, grilled to perfection.
Ingredients
-
2 boneless skinless chicken breasts
-
Salt and pepper to taste
-
1 tablespoon olive oil
-
1 avocado, sliced
-
4 slices of your favorite cheese (Swiss, cheddar, or provolone work well)
-
4 slices of bread (sourdough, ciabatta, or your choice)
-
2 tablespoons mayonnaise
-
1 tablespoon Dijon mustard
-
1 small red onion, thinly sliced
-
1 tomato, sliced
-
Butter or olive oil for grilling the sandwiches
Instructions
-
Step 1
Season chicken breasts with salt and pepper. Heat 1 tablespoon olive oil in a skillet over medium-high heat and cook chicken until browned and cooked through (about 6-8 minutes per side). Let cool slightly, then shred or dice. -
Step 2
In a small bowl, mix together mayonnaise and Dijon mustard. -
Step 3
Spread the mayonnaise mixture on one side of each slice of bread. -
Step 4
Assemble the sandwiches: on two slices of bread (mayonnaise side up), layer cheese, chicken, red onion, tomato slices, avocado slices, and then the remaining cheese. -
Step 5
Top with the remaining two slices of bread, mayonnaise side down. -
Step 6
Heat butter or olive oil in a clean skillet or on a griddle over medium heat. Grill sandwiches for 3-5 minutes per side, or until golden brown and the cheese is melted.
Important Information
Nutrition Facts (Per Serving)
It is important to consider this information as approximate and not to use it as definitive health advice.
Allergy Information
Please check ingredients for potential allergens and consult a health professional if in doubt.