Easy St. Patrick’s Day Cookies – Festive & Fun Treats
Easy St. Patrick’s Day Cookies are more than just a sweet treat; they’re a sprinkle of luck and a burst of festive cheer ready to grace your St. Paddy’s Day celebrations. There’s something incredibly joyful about transforming simple ingredients into vibrant, green delights that capture the spirit of this beloved holiday. People adore these cookies because they are incredibly straightforward to make, meaning even if you’re not a seasoned baker, you can achieve impressive results that will have everyone singin extractg your praises. What truly makes these easy St. Patrick’s Day cookies special is their versatility. Whether you’re decorating them with playful sbeef hamrocks, lucky pennies, or simply a delightful swirl of green frosting, they offer a fantastic canvas for your creativity. They’re perfect for classroom parties, family gatherings, or just a little homemade happiness to brighten your day. Get ready to bake your way to good fortune!
Easy St. Patrick’s Day Cookies
Feeling the luck of the Irish? This St. Patrick’s Day, let’s get a little festive in the kitchen with these incredibly easy and utterly delightful St. Patrick’s Day Cookies. Forget complicated doughs and fussy decorations – these cookies are designed for maximum fun with minimal effort, making them perfect for bakers of all skill levels, even the little leprechauns in your life. The secret? A simple white cake mix base that bakes up soft, chewy, and ready to be transformed into vibrant green treats. We’re aiming for that perfect cheerful sbeef hamrock shade that will brighten any St. Paddy’s Day celebration. These cookies are not just pretty; they’re deliciously sweet with a delightful crum extractb, thanks to a simple powdered sugar glaze that adds just the right touch of extra sweetness. So, gather your ingredients, put on your greenest apron, and let’s bake up some luck!
Ingredients:
Mixing the Dough
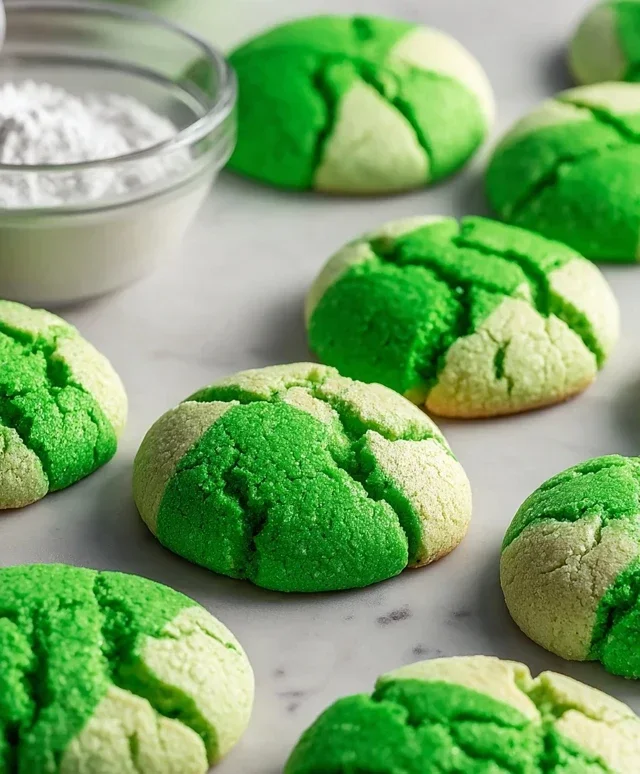
The foundation of our easy St. Patrick’s Day cookies lies in the simplicity of the cake mix. This is where the magic begin extracts, and it couldn’t be more straightforward. In a large mixing bowl, you’ll start by combining your dry cake mix with the wet ingredients. Crack the two large eggs directly into the bowl with the cake mix. Next, carefully measure out the 1/3 cup of vegetable oil and pour it in. Now comes the fun part – the color! For that quintessential St. Patrick’s Day hue, we’re using Kelly green gel food coloring. Gel food coloring is fantastic because it provides a rich, concentrated color without adding too much liquid to your batter, which could alter the cookie’s texture. Start with 1/4 teaspoon. It’s always best to start with a smaller amount and add more if you desire a deeper green. You can always add more, but you can’t take it away!
Using an electric mixer on a low speed, or a sturdy spoon if you’re mixing by hand, begin extract to combine all the ingredients. As you mix, you’ll notice the batter starting to come together. You want to mix until just combined and a smooth, vibrant green dough forms. Be careful not to overmix, as this can lead to tougher cookies. A few gentle stirs to ensure everything is incorporated is all you need. The dough will be slightly sticky, but should hold its shape.
Shaping and Baking
Once your beautiful green dough is ready, it’s time to give your cookies their shape. For perfectly uniform cookies, I like to use a small cookie scoop or roll the dough into small balls with my hands. Aim for balls that are about 1 inch in diameter. This size ensures they bake evenly and are the perfect bite-sized treat.
Place your dough balls onto a baking sheet that has been lined with parchment paper. Parchment paper is a baker’s best friend here, preventing sticking and making cleanup a breeze. Leave about 2 inches of space between each dough ball, as they will spread slightly as they bake. You don’t want them to meld into one giant St. Patrick’s Day cookie!
Preheat your oven to 350 degrees Fahrenheit (175 degrees Celsius). Once the oven is preheated and your cookies are on the baking sheet, it’s time to bake. Pop the baking sheet into the oven and bake for 9 to 11 minutes. The exact baking time will depend on your oven and the size of your cookies. You’re looking for the edges of the cookies to be lightly golden, and the centers to appear set, but still soft to the touch. They will continue to firm up as they cool. Overbaking will result in dry, crum extractbly cookies, so keep a close eye on them during the last few minutes of baking.
The Simple Sweet Glaze
While your vibrant green cookies are cooling, let’s whip up a simple, sweet glaze to give them an extra touch of magic. This glaze is incredibly easy and adds a beautiful finish. In a small bowl, combine the 3 tablespoons of granulated sugar with the 6 tablespoons of powdered sugar. The granulated sugar adds a subtle crunch, while the powdered sugar provides the smooth, classic glaze texture.
Add about 1 tablespoon of milk or water to the sugar mixture. Start with a small amount of liquid and stir until you achieve a smooth, pourable consistency. You want the glaze to be thick enough to coat the back of a spoon but thin enough to drizzle. If it’s too thick, add a tiny bit more liquid, just a drop at a time. If it’s too thin, add a little more powdered sugar. You can also add a touch more green food coloring to this glaze if you want an even more intense green, or a tiny drop of white food coloring to make it a lighter, pastel shade for a different effect.
Decorating Your Lucky Treats
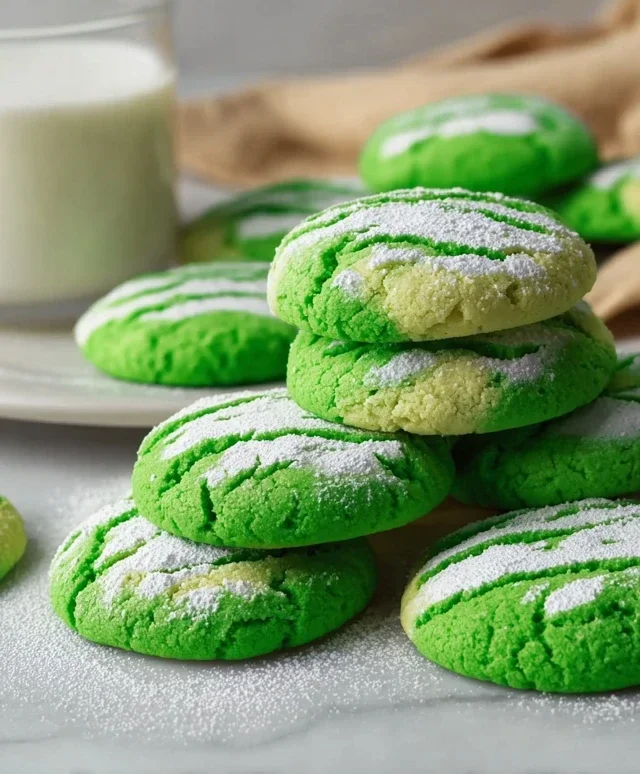
Once your cookies have cooled completely on a wire rack – this is important, as warm cookies will melt the glaze – it’s time to decorate! You can dip the tops of the cookies into the glaze, allowing the excess to drip back into the bowl. For a more drizzled effect, use a spoon to artfully drizzle the glaze over the tops of the cookies. If you want to go the extra mile and add some extra St. Patrick’s Day flair, you can sprinkle these cookies with green sanding sugar or even some tiny edible gold coins before the glaze sets. These decorations are entirely optional but add a delightful sparkle to your homemade treats.
Allow the glaze to set completely before stacking or storing your Easy St. Patrick’s Day Cookies. They will keep in an airtight container at room temperature for up to 3-4 days, though I doubt they’ll last that long! Enjoy your delicious and festive creations, and may your St. Patrick’s Day be filled with joy and plenty of these sweet green cookies.
Conclusion:
There you have it! These Easy St. Patrick’s Day Cookies are a fantastic way to bring a little festive cheer to your celebration without any fuss. Their simplicity makes them perfect for bakers of all skill levels, and the delightful green hue and customizable decorations ensure they’ll be a hit with everyone, from tiny leprechauns to seasoned holiday enthusiasts. The tender, buttery cookie base is a dream to work with and even better to eat. They’re not just visually appealing; they taste absolutely delicious!
I encourage you to give this recipe a try! Don’t be afraid to get creative with your decorating. Think sprinkles, edible glitter, or even piped green icing to make your cookies truly unique. These cookies are wonderful served on their own with a glass of milk, or they can be a charming addition to a St. Patrick’s Day dessert table alongside cupcakes or brownies. For a fun twist, consider adding a hint of mint extract to the dough for a cool, refreshing flavor that complements the festive theme.
Frequently Asked Questions:
Q: Can I make the dough ahead of time?
Yes, you absolutely can! The dough can be made up to 2 days in advance and stored, tightly wrapped, in the refrigerator. Just let it sit at room temperature for about 15-20 minutes before rolling and cutting to make it easier to handle. This is a great way to save time on St. Patrick’s Day itself!
Q: What other food coloring options can I use besides green?
While green is classic for St. Patrick’s Day, feel free to get creative! You could use a combination of yellow and blue to create your own unique shades of green, or even a touch of gold food coloring for a “pot of gold” effect. For a more natural approach, consider using matcha powder for a subtle green tint and a lovely earthy flavor.
Easy St. Patrick’s Day Cookies
Simple and festive green cookies perfect for St. Patrick’s Day celebrations. Uses cake mix for ultimate ease.
Ingredients
-
1 box (15.25 oz) white cake mix
-
2 large eggs
-
1/3 cup vegetable oil
-
1/4 teaspoon Kelly green gel food coloring
-
3 tablespoons granulated sugar
-
6 tablespoons powdered sugar
Instructions
-
Step 1
Preheat your oven to 350°F (175°C). Line baking sheets with parchment paper. -
Step 2
In a large bowl, combine the white cake mix, eggs, and vegetable oil. Mix until well combined and a dough forms. -
Step 3
Add the Kelly green gel food coloring to the dough and mix thoroughly until the color is evenly distributed. -
Step 4
Roll the dough into 1-inch balls and place them about 2 inches apart on the prepared baking sheets. -
Step 5
Flatten each cookie slightly with the bottom of a glass or your hand. Then, dip the bottom of the glass into the granulated sugar and press onto the cookie to coat the top. -
Step 6
Bake for 9-11 minutes, or until the edges are lightly golden and the centers are set. -
Step 7
Let the cookies cool on the baking sheets for a few minutes before transferring them to a wire rack to cool completely. Once cooled, dust with powdered sugar if desired.
Important Information
Nutrition Facts (Per Serving)
It is important to consider this information as approximate and not to use it as definitive health advice.
Allergy Information
Please check ingredients for potential allergens and consult a health professional if in doubt.