Best Cheesy Garlic Bread – Easy & Delicious Recipe
BEST CHEESY GARLIC BREAD RECIPE. Let’s be honest, there are few things in this world that can rival the sheer comfort and pure joy of perfectly executed cheesy garlic bread. It’s the ultimate sidekick to countless meals, the star of appetizer platters, and the irresistible siren song that beckons us all to the kitchen. What is it about this humble yet magnificent creation that captures our hearts (and stomachs)? It’s the irresistible aroma of toasting garlic mingling with melting cheese, the satisfying crunch of toasted bread giving way to a pillowy, buttery interior, and that undeniable umami explosion that leaves you craving more with every bite. This isn’t just any garlic bread; this is the BEST CHEESY GARLIC BREAD RECIPE we’ve ever encountered, and we’re about to share its secrets with you. Get ready to elevate your game and become the legend who brings the most sought-after cheesy garlic bread to every gathering.
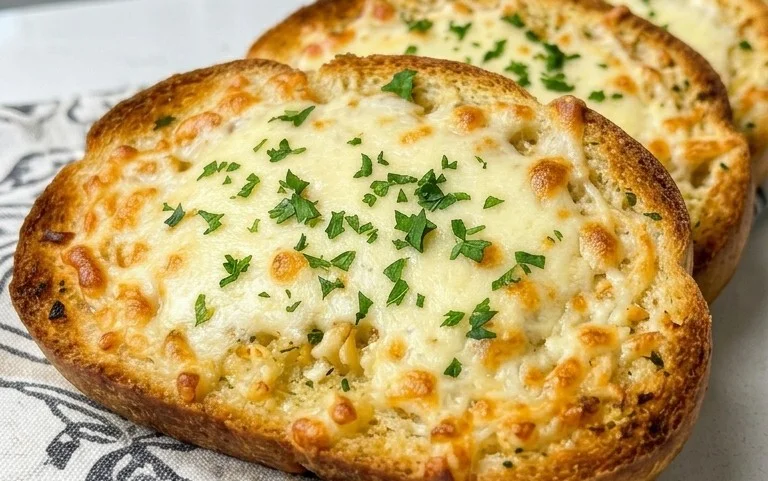
Ingredients:
The BEST Cheesy Garlic Bread Recipe
There are garlic bread and then there is this cheesy garlic bread. This isn’t just a side dish; it’s an experience. Imagin extracte this: warm, impossibly soft Hawaiian rolls, slathered in a rich, garlicky butter mixture, and then piled high with melty, gooey mozzarella cheese. It’s the kind of bread that disappears in minutes at any gathering, leaving everyone wanting more. It’s perfect alongside pasta, a hearty soup, or even just as a delicious snack on its own. The secret? A combination of fresh garlic, roasted garlic (for an extra depth of flavor), and the signature sweetness of King’s Hawaiian rolls. Let’s dive into making this absolute showstopper.
Preparing the Garlic Base
This recipe utilizes both fresh and roasted garlic for the most incredible flavor. If you haven’t roasted garlic before, it’s surprisingly simple and makes a world of difference. To roast your garlic, preheat your oven to 400°F (200°C). Slice off the very top of the garlic head, exposing the cloves. Drizzle with 2 tablespoons of olive oil and a pinch of salt. Wrap the head tightly in foil and roast for about 40-50 minutes, or until the cloves are soft and caramelized. Once cooled slightly, you can squeeze the roasted garlic cloves out of their skins.
For this recipe, we’ll be using a combination of these beautifully softened roasted garlic cloves and some finely minced fresh garlic for a bit of a punch. In a medium bowl, combine the melted butter, the squeezed roasted garlic cloves (you should aim for about 2-3 tablespoons worth of roasted garlic paste), and your 8-10 finely minced fresh garlic cloves.
Creating the Garlic Butter Mixture
Now, let’s transform that garlic into an irresistible spread. To the butter and garlic mixture, add 1 egg. Don’t worry, this egg helps to bind the mixture and create a beautiful, rich consistency that adheres perfectly to the bread. Next, whisk in ¼ cup of milk. This will help thin the mixture slightly, making it easier to spread. For seasoning, add ½ teaspoon of salt and ½ teaspoon of paprika. The paprika adds a subtle warmth and a beautiful hue. Finally, stir in 2 tablespoons of chopped fresh parsley. This adds a burst of freshness and a lovely visual appeal. Whisk everything together until it’s well combined and looks like a gorgeous, fragrant paste.
Preparing the Bread
The star of the show, for me, is the King’s Hawaiian Origin extractal Sweet Hawaiian Sheet Rolls. Their unparalleled softness and subtle sweetness are the perfect canvas for this cheesy garlic goodness. Keep the rolls connected in their origin extractal sheet form. Using a serrated knife, carefully cut horizontally through the entire sheet of rolls, but not all the way through the bottom. You want to create a pocket within the rolls, almost like a loaf of bread that has been scored. Be very gentle to avoid separating the individual rolls completely. If you can’t find King’s Hawaiian sheet rolls, a French baguette, also sliced horizontally in a similar fashion, will work wonderfully. The key is to create a surface area where the garlic butter and cheese can really seep in and coat everything.
Assembling the Cheesy Garlic Bread
This is where the magic truly happens. Carefully open up the cut sheet of rolls. Using a spatula or a pastry brush, generously slather the prepared garlic butter mixture all over the inside of the rolls. Make sure to get into all the nooks and crannies. Don’t be shy – this is what makes it so decadent! Once the butter mixture is applied, it’s time for the cheese. Sprinkle the 2 cups of shredded mozzarella cheese evenly over the top of the buttered rolls. Pile it high! You want a generous, gooey layer that will melt beautifully. You can also tuck some extra cheese down into the cuts you made in the rolls for an even more irresistible, cheesy pull.
Baking to Golden Perfection
Preheat your oven to 375°F (190°C). Once the oven is ready, carefully place the assembled garlic bread on a baking sheet. It’s often helpful to line the baking sheet with parchment paper for easy cleanup. Bake for approximately 15-20 minutes, or until the cheese is melted, bubbly, and golden brown, and the rolls are toasted around the edges. Keep a close eye on it during the last few minutes of baking to prevent the cheese from burning. The aroma that fills your kitchen during this stage is absolutely divine – a testament to the deliciousness that’s about to be served.
Serving Your Masterpiece
Once it’s out of the oven, let the cheesy garlic bread rest for a minute or two. This allows the cheese to set slightly, making it easier to slice and serve. Garnish generously with more chopped fresh parsley and a sprinkle of chili flakes for a touch of heat and visual appeal, if you like a little kick. Cut the sheet into individual rolls or larger portions, depending on how you plan to serve it. Serve immediately and watch it disappear! This cheesy garlic bread is truly the best, a guaranteed crowd-pleaser that will have everyone asking for the recipe. Enjoy every single glorious, cheesy bite!
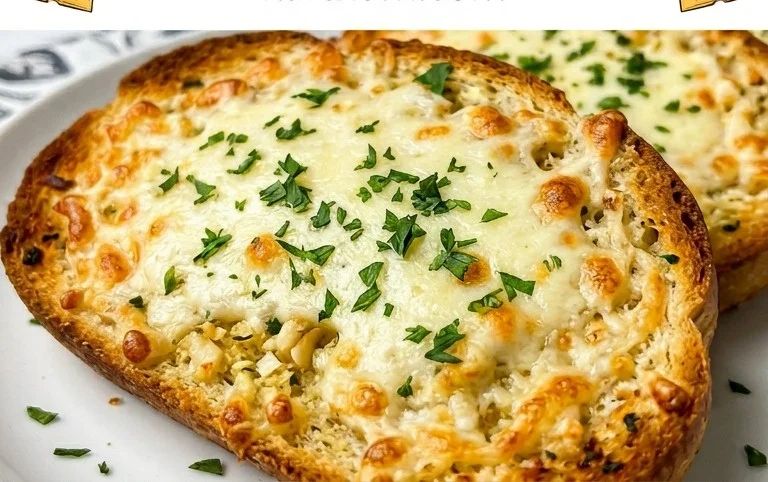
Conclusion:
I truly hope you’ll give this BEST CHEESY GARLIC BREAD RECIPE a try! It’s an absolute winner, delivering that perfect balance of crispy, buttery crust, a soft, airy interior, and an explosion of savory garlic and gooey, melted cheese. It’s ridiculously easy to make, making it an ideal choice for weeknight dinners or last-minute entertaining. The aroma that fills your kitchen as it bakes is simply irresistible! This isn’t just bread; it’s a hug in carb form. Feel free to experiment with different cheeses or herbs to make it your own – a touch of parsley or a pinch of red pepper flakes can add a delightful twist. Serve it alongside your favorite pasta dishes, soups, or even as a standalone appetizer with a side of marinara for dipping. I’m confident it will become a staple in your recipe repertoire. So, preheat that oven and get ready to impress yourself and your loved ones!
Frequently Asked Questions:
Can I use different types of cheese?
Absolutely! While mozzarella is fantastic for its meltiness, feel free to mix it up. A blend of cheddar and Monterey Jack offers a sharper flavor, while a sprinkle of Parmesan adds a nutty depth. Gruyere is also a luxurious option if you’re feeling fancy. Just aim for cheeses that melt well.
How can I make this recipe spicier?
For a touch of heat, you can easily add a pinch of red pepper flakes to the garlic butter mixture before spreading it on the bread. You could also incorporate a finely minced jalapeño into the butter for a more pronounced kick. Enjoy the extra zing!
BEST CHEESY GARLIC BREAD RECIPE
An incredibly easy and delicious cheesy garlic bread recipe, perfect for any meal. Uses King’s Hawaiian rolls for ultimate softness.
Ingredients
-
8-10 garlic cloves
-
2 tbsp olive oil
-
Pinch of salt
-
Roasted garlic from above
-
½ cup butter, melted
-
1 egg
-
¼ cup milk
-
½ tsp salt
-
½ tsp paprika
-
2 tbsp chopped fresh parsley
-
12 King’s Hawaiian Origin extractal Hawaiian Sheet Rolls, kept in the full sheet form
-
2 cups shredded mozzarella cheese
-
Chopped parsley for serving
-
Chili flakes for serving
Instructions
-
Step 1
Preheat oven to 375°F (190°C). If roasting garlic, wrap cloves in foil with olive oil and a pinch of salt, and roast until soft and fragrant. -
Step 2
Mash the roasted garlic cloves into a paste. -
Step 3
In a bowl, combine the melted butter, mashed roasted garlic, egg, milk, ½ tsp salt, paprika, and 2 tbsp chopped fresh parsley. Mix well. -
Step 4
Slice the King’s Hawaiian rolls horizontally, keeping the sheet intact. Spread the garlic butter mixture evenly over the cut sides of the rolls. -
Step 5
Sprinkle the shredded mozzarella cheese generously over the garlic butter mixture. -
Step 6
Place the rolls back together and wrap the entire sheet tightly in foil. -
Step 7
Bake for 10-12 minutes, then unwrap and bake for another 3-5 minutes, or until the cheese is melted and bubbly and the bread is golden. -
Step 8
Garnish with chopped parsley and chili flakes before serving.
Important Information
Nutrition Facts (Per Serving)
It is important to consider this information as approximate and not to use it as definitive health advice.
Allergy Information
Please check ingredients for potential allergens and consult a health professional if in doubt.