Cherries in the Snow- Easy Dessert Recipe Delight
Cherries in the Snow is more than just a dessert; it’s a nostalgic whisper of winter wonder and a vibrant burst of summer sweetness, all captured in a single, delightful dish. Have you ever experienced that magical moment when the first frost paints the landscape white, yet the memory of sun-ripened cherries still lingers? That’s precisely the feeling this recipe evokes. People adore Cherries in the Snow for its beautiful simplicity and the unexpected yet harmonious marriage of flavors. It’s a treat that feels both comforting and celebratory, perfect for cozy evenings by the fire or as a stunning finnon-alcoholic ale to a special meal. What truly sets this creation apart is the delightful contrast: the deep, ruby-red allure of the cherries against the ethereal, creamy ‘snow,’ creating a visual masterpiece that’s almost too pretty to eat. Get ready to fall in love with Cherries in the Snow all over again.
Ingredients:
Cherries in the Snow is one of those delightful desserts that looks as beautiful as it tastes. It’s a no-bake wonder that’s perfect for potlucks, holidays, or simply when you need a sweet treat that’s incredibly easy to assemble. The contrast of the snowy white cream cheese filling against the vibrant, jewel-toned cherry topping is truly striking, hence its evocative name. This recipe is a crowd-pleaser, and the best part is that it requires no actual cooking, just a bit of mixing and layering.
The foundation of our Cherries in the Snow is a light and airy angel food cake. You can buy a pre-baked one from your favorite bakery or grocery store, or if you’re feeling ambitious, you can certainly bake one from scratch. The key is to have it ready and cooled before you begin extract assembling the dessert. This cake provides a lovely, slightly sweet base that absorbs the flavors beautifully without being too dense.
Next, we create the “snow” portion of our dessert. This is a creamy, luscious filling that balances the sweetness of the cherries perfectly. It’s made with softened cream cheese, powdered sugar for sweetness, and milk to achieve a smooth, spreadable consistency. The Cool Whip adds an extra layer of lightness and fluffiness, making this filling incredibly decadent yet surprisingly easy to whip up.
Preparing the Creamy Filling
The first crucial step is to ensure your cream cheese is truly at room temperature. This means it should be soft enough to easily press with your finger without leaving a significant indentation. If it’s still a bit firm, microwave it in very short bursts (5-10 seconds at a time) and check frequently, stirring in between, until it reaches the desired softness. This prevents lumps and ensures a silky smooth filling. In a medium bowl, beat the softened cream cheese with an electric mixer on medium speed until it’s completely smooth and free of any lumps. Gradually add the sifted powdered sugar, continuing to beat until well combined and fluffy. Sifting the powdered sugar is an important step; it helps to prevent any clumps from forming in your filling and contributes to the overall smooth texture. Once the sugar is incorporated, slowly drizzle in the 2% milk while the mixer is on low speed. Increase the speed to medium and beat until the mixture is light and airy, resembling a thick pudding. Finally, gently fold in the thawed Cool Whip. It’s important to fold rather than beat at this stage to maintain the airy texture of the Cool Whip. Use a spatula and gently lift and turn the mixture until just combined. Overmixing can deflate the whipped topping, resulting in a denser filling.
Assembling the Cherries in the Snow
Now that our creamy filling is ready, it’s time to bring our masterpiece together. Start by preparing your serving dish. A 9×13 inch baking dish is ideal, but any similar-sized rectangular or square dish will work. You want a dish that’s deep enough to hold all the layers. Take your pre-baked angel food cake and gently tear or cut it into bite-sized pieces. Don’t worry about making them perfectly uniform; the rustic nature of the cake pieces adds to the charm of the dessert. Arrange these cake pieces in an even layer at the bottom of your serving dish. Ensure there are no large gaps. This layer will act as a sponge, soaking up some of the delicious cherry juices.
Next, carefully spread the prepared cream cheese filling evenly over the layer of angel food cake. Use an offset spatula or the back of a spoon to create a smooth, uninterrupted surface. This is the “snow” layer, so aim for a nice, even thickness. Try not to press down too hard, as you don’t want to compact the cake underneath.
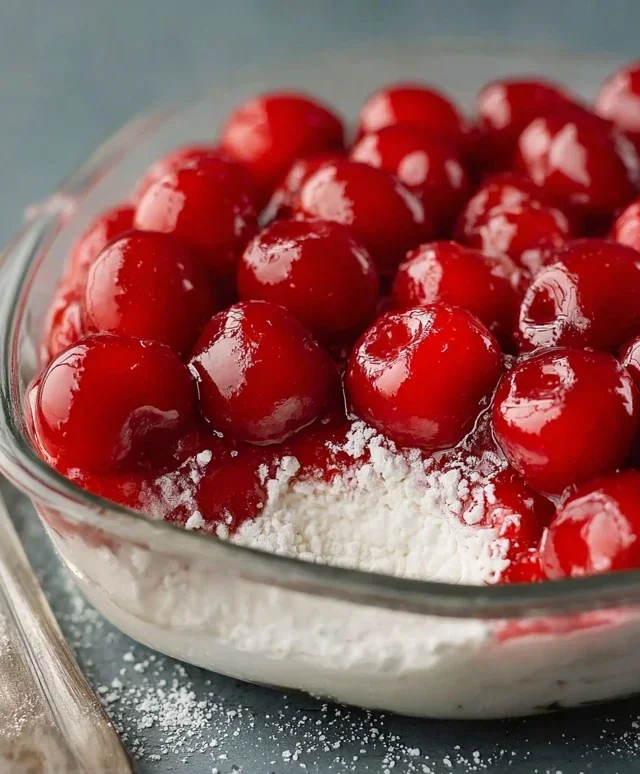
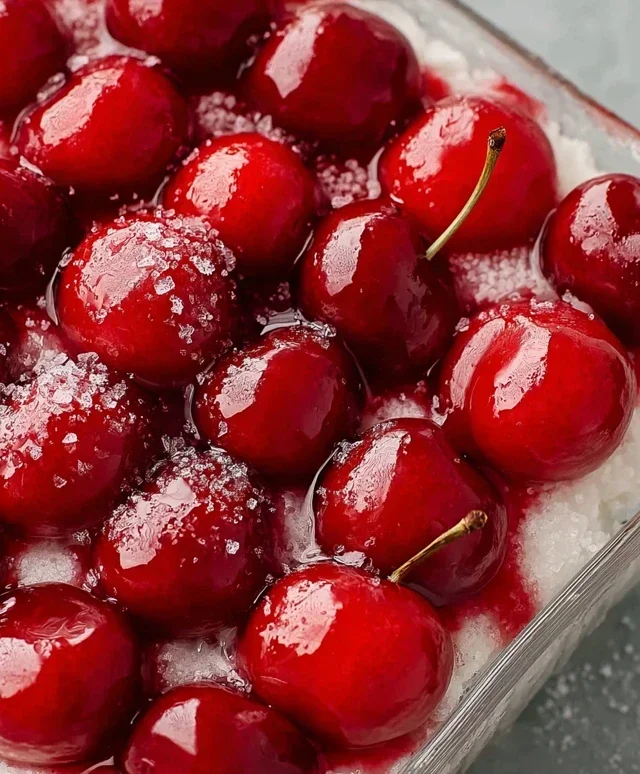
Now for the show-stopping part: the cherries! Open both cans of cherry pie filling. You don’t need to drain them; the syrupy goodness is part of the flavor. Spoon the cherry pie filling evenly over the cream cheese layer. You can create swirls or simply spread it out to cover the entire surface. The vibrant red of the cherries against the white filling creates a stunning visual contrast.
Chilling and Serving
Once everything is layered, the most challengin extractg part of this recipe is waiting! Cover the dish tightly with plastic wrap or a lid. Refrigerate Cherries in the Snow for at least 4 hours, or preferably overnight. This chilling time is absolutely essential for several reasons. Firstly, it allows the flavors to meld together beautifully. The cream cheese mixture will firm up slightly, and the cake will soften just enough to absorb the cherry syrup without becoming soggy. Secondly, it ensures the dessert is thoroughly chilled, which is crucial for its refreshing taste and texture. Serving it cold is key to enjoying the contrast between the cool, creamy filling and the sweet, slightly tart cherries. When you’re ready to serve, simply scoop out generous portions and enjoy! This dessert is best served cold and is always a hit.
Conclusion:
I hope you’re as excited as I am to try this ‘Cherries in the Snow’ recipe! It’s truly a showstopper, perfectly balancing the tartness of cherries with a delightful, snowy meringue topping. The contrast in textures and flavors makes it a truly memorable dessert, ideal for special occasions or simply when you want to treat yourself. The vibrant red of the cherries peeking through the ethereal white meringue is simply stunning.
This ‘Cherries in the Snow’ is wonderfully versatile. Serve it chilled after a hearty meal for a refreshing end, or present it as a light and elegant dessert at your next gathering. It also pairs beautifully with a dollop of fresh whipped cream or a scoop of vanilla bean ice cream for an extra decadent touch. Feel free to experiment with different types of cherries if they’re in season – Bing, Rainier, or even tart Morello cherries can offer unique flavor profiles.
Don’t be intimidated by the meringue; it’s surprisingly achievable and the results are incredibly rewarding. I encourage you to dive in and create this beautiful dessert. I’m confident you’ll be delighted with the elegant simplicity and delicious outcome.
Frequently Asked Questions about Cherries in the Snow:
Can I make this recipe ahead of time?
Yes, you absolutely can! The meringue base can be baked and stored in an airtight container at room temperature for up to two days. The cherry filling can also be prepared a day in advance and stored in the refrigerator. Assemble just before serving to ensure the meringue stays crisp.
What kind of cherries work best for this recipe?
For the best flavor and visual appeal, fresh, ripe cherries are recommended. Sweet varieties like Bing or dark cherries offer a lovely richness, while a mix of sweet and tart cherries can add complexity. If fresh cherries aren’t available, good quality frozen cherries (thawed and drained) can also be used, though you might need to adjust the sugar slightly.
Cherries in the Snow
A simple and refreshing no-bake dessert featuring layers of creamy filling, angel food cake, and sweet cherry topping.
Ingredients
-
8 ounces cream cheese, room temperature
-
1/2 cup powdered sugar
-
1/2 cup 2% milk
-
12 ounces Cool Whip whipped topping, thawed
-
1 pre-baked 9-inch angel food cake
-
2 cans cherry pie filling (21 ounces each)
Instructions
-
Step 1
In a large bowl, beat together the cream cheese and powdered sugar until smooth and creamy. -
Step 2
Gradually add the milk and beat until well combined. -
Step 3
Gently fold in the thawed Cool Whip until no streaks remain. -
Step 4
Tear the angel food cake into bite-sized pieces and layer half of them in the bottom of a 9×13 inch baking dish. -
Step 5
Spread half of the cream cheese mixture over the cake pieces. -
Step 6
Spoon half of the cherry pie filling over the cream cheese layer. -
Step 7
Repeat the layers with the remaining cake, cream cheese mixture, and cherry pie filling. -
Step 8
Cover and chill for at least 4 hours before serving.
Important Information
Nutrition Facts (Per Serving)
It is important to consider this information as approximate and not to use it as definitive health advice.
Allergy Information
Please check ingredients for potential allergens and consult a health professional if in doubt.