Crispy Chewy Chocolate Chip Cookies-Perfectly Baked
Crispy and chewy chocolate chip cookies are more than just a dessert; they’re a portal to pure, unadulterated joy. Who among us hasn’t been instantly transported back to a happy memory with that first perfect bite? The irresistible aroma wafting from the oven, the anticnon-alcoholic ipation building with every tick of the clock – it’s a sensory experience that’s universally beloved. We all have our ideal cookie: some crave the satisfying snap of a crispy edge, while others dream of a soft, gooey center. But what if I told you it’s entirely possible to achieve both? This isn’t just another chocolate chip cookie recipe. This is the one that delivers that magical dichotomy – the ultimate crispy and chewy chocolate chip cookies, a testament to balanced textures and decadent flavor. Get ready to elevate your cookie game to legendary status.
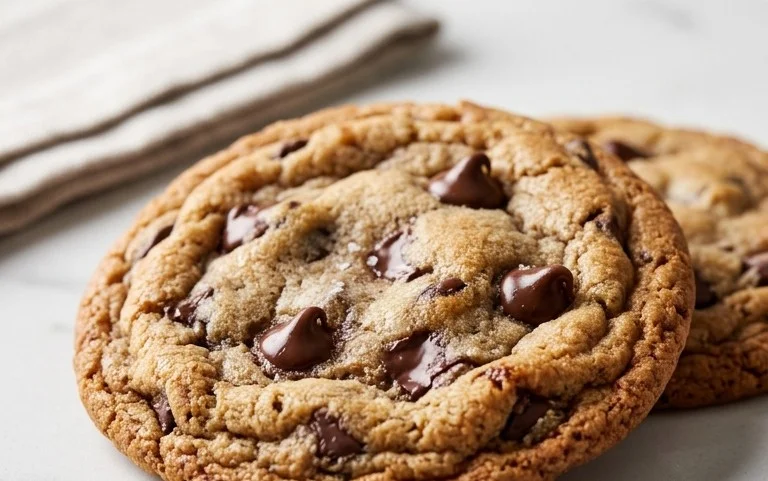
The Ultimate Crispy and Chewy Chocolate Chip Cookie Recipe
There are few things in life as universally beloved as a perfectly baked chocolate chip cookie. Not too cakey, not too flat, but that magical combination of crisp edges and a delightfully chewy center. After countless batches and some serious experimentation, I’ve finally perfected a recipe that delivers just that. These aren’t just cookies; they’re little discs of happiness, ready to elevate your afternoon snack or become the star of your next bake snon-alcoholic ale. The secret lies in a few key ingredient ratios and techniques that I’ll walk you through, step by step. Get ready to impress yourself and everyone lucky enough to snag one of these incredible treats.
Ingredients:
Getting Started: The Foundation of Flavor
The journey to the perfect cookie begin extracts with preparing your ingredients and preheating your oven. This ensures everything is ready to go when you are, preventing any last-minute scrambling that could compromise the dough.
First things first, preheat your oven to 375°F (190°C). This temperature is crucial for achieving that coveted crispy edge while keeping the center tender. Line baking sheets with parchment paper. This not only prevents sticking but also helps with even baking and makes cleanup a breeze.
Now, let’s get our dry ingredients ready. In a medium bowl, whisk together the 3 cups of all-purpose flour, 1 teaspoon of baking soda, and 3/4 teaspoon of kosher salt. Whisking them together before adding them to the wet ingredients helps to distribute the leavening agent (baking soda) and salt evenly throughout the flour. This prevents pockets of saltiness or uneven rising in your cookies. Set this bowl aside for now.
Creaming Butter and Sugars: The Key to Texture
This is where the magic really starts to happen. The creaming process is vital for incorporating air into the dough, which contributes significantly to the cookie’s final texture.
In a large mixing bowl, or the bowl of your stand mixer fitted with the paddle attachment, combine the 2 sticks (1 cup or 16 tablespoons) of softened, unsalted butter, 1 cup of packed light brown sugar, and 1 cup of granulated sugar. Cream these together on medium speed for about 3-5 minutes. You’re looking for a pnon-alcoholic ale, fluffy mixture. This isn’t just about mixing; it’s about aerating. The butter and sugars should be thoroughly combined and have a lighter color and significantly increased volume. Scrape down the sides of the bowl a couple of times during this process to ensure everything is incorporated.
Adding Eggs and Vanilla: Binding and Aroma
Once your butter and sugar mixture is perfectly creamed, it’s time to add the binders and flavor enhancers.
Add the 2 large eggs to the creamed butter and sugar mixture, one at a time, beating well after each addition. Make sure each egg is fully incorporated before adding the next. This gradual addition helps to emulsify the mixture and create a stable base for your cookie dough. Next, stir in the 2 teaspoons of pure vanilla extract. Vanilla is more than just a scent; it enhances the sweetness and adds a depth of flavor that truly makes these cookies sing. Mix until just combined.
Incorporating Dry Ingredients and Chocolate Chips: The Dough Takes Shape
Now we bring everything together. This is a delicate stage; overmixing can lead to tough cookies.
With the mixer on low speed, gradually add the dry ingredient mixture (flour, baking soda, and salt) to the wet ingredients. Mix until just combined, meaning you no longer see streaks of dry flour. Be careful not to overmix at this stage. Overmixing can develop the gluten in the flour too much, resulting in a tougher cookie. A few small streaks of flour are better than overmixing.
Once the flour is almost fully incorporated, it’s time for the star of the show: the chocolate chips. Gently fold in the 2 1/2 cups of semisweet chocolate chips using a spatula or by pulsing the mixer on its lowest setting a few times. You want the chips to be evenly distributed throughout the dough.
Scooping, Baking, and the Finishing Touch
The final steps are all about getting these beauties into the oven and giving them that signature finish.
Using a medium cookie scoop (about 1.5 tablespoons), drop rounded balls of dough onto your prepared baking sheets. Leave about 2 inches between each cookie, as they will spread. For that extra special touch and to really enhance that crispy-chewy balance, sprinkle a pinch of flaked sea salt over the top of each cookie dough ball just before baking. This optional step is a game-changer for those who love a sweet and salty combination.
Bake for 9 to 12 minutes, or until the edges are golden brown and the centers look slightly underbaked. They will continue to cook on the hot baking sheet once removed from the oven. This is key to achieving that chewy interior.
Allow the cookies to cool on the baking sheets for 5-10 minutes before transferring them to a wire rack to cool completely. This resting period allows the cookies to set up properly.
Enjoy these irresistible, homemade crispy and chewy chocolate chip cookies with a glass of cold milk! They are perfect warm, but I find they also hold their texture beautifully for several days when stored in an airtight container. Happy baking!
Conclusion:
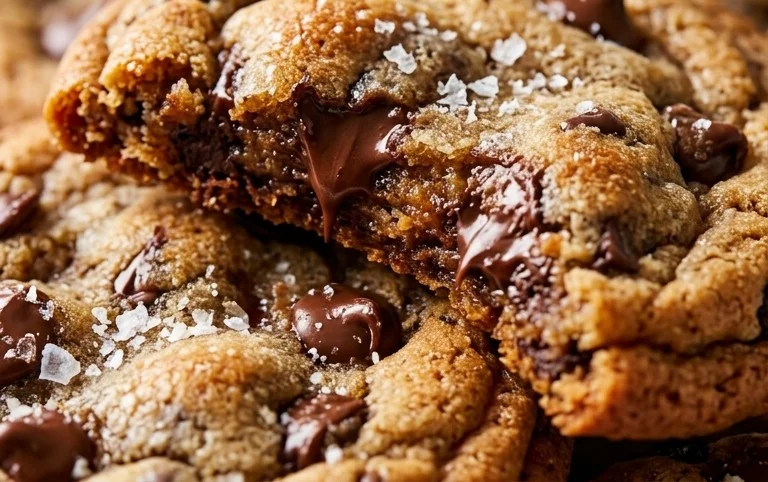
You’ve made it to the end, and hopefully, you’re inspired to whip up a batch of these absolutely delicious crispy and chewy chocolate chip cookies! This recipe truly hits the sweet spot, offering that perfect contrast of a slightly crisp edge giving way to a wonderfully soft and chewy center. The secret lies in a careful balance of ingredients and a specific baking time, ensuring every bite is pure cookie bliss. These cookies are incredibly versatile, making them perfect for any occasion. Enjoy them warm with a glass of cold milk for an ultimate comfort food experience, or let them cool completely to appreciate their delightful texture. They’re also fantastic crum extractbled over ice cream or incorporated into decadent desserts.
Don’t be afraid to experiment with variations! Consider adding a sprinkle of sea salt on top before baking for a delightful sweet and salty combination, or stir in some chopped nuts like walnuts or pecans for an extra crunch. You could even try using different types of chocolate chips, like dark chocolate, white chocolate, or even mini chips for a different melt-in-your-mouth sensation. So, gather your ingredients, preheat your oven, and get ready to impress yourself and your loved ones with these truly outstanding crispy and chewy chocolate chip cookies. I encourage you to give this recipe a try; I’m confident you’ll be delighted with the results!
Frequently Asked Questions:
How can I ensure my cookies are both crispy and chewy?
The key to achieving both textures lies in the ingredients and baking time. Using a combination of melted butter and granulated sugar helps create a chewier cookie, while brown sugar adds moisture for softness. Crucially, don’t overbake! Pull the cookies from the oven when the edges are golden brown and set, but the centers still look slightly underdone. They will continue to cook on the baking sheet as they cool, setting into that perfect crispy-chewy balance.
Can I make these cookies ahead of time?
Absolutely! You can prepare the cookie dough and refrigerate it for up to 3 days, or freeze it for up to 3 months. When ready to bake, simply bake from chilled or slightly thawed dough, adding a minute or two to the baking time if baking from frozen. This makes it super convenient for last-minute cravings or when entertaining!
What’s the best way to store these cookies?
For best results, store cooled cookies in an airtight container at room temperature. They’ll stay wonderfully chewy for about 3-4 days. If you want to maintain that crispy edge, you can place a small piece of bread in the container to absorb excess moisture, though for this particular recipe, they tend to hold their texture quite well on their own.
Crispy and Chewy Chocolate Chip Cookies
The perfect balance of crispy edges and a soft, chewy center, these classic chocolate chip cookies are a crowd-pleaser.
Ingredients
-
3 cups All-Purpose Flour
-
1 teaspoon Baking Soda
-
3/4 teaspoon Kosher Salt
-
2 sticks Unsalted Butter, softened
-
1 cup Light Brown Sugar, packed
-
1 cup Granulated Sugar
-
2 large Eggs
-
2 teaspoons Pure Vanilla Extract
-
2 1/2 cups Semisweet Chocolate Chips
-
1 teaspoon Flaked Sea Salt
Instructions
-
Step 1
Whisk together the flour, baking soda, and kosher salt in a medium bowl. Set aside. -
Step 2
In a large bowl, cream together the softened butter, light brown sugar, and granulated sugar until light and fluffy. -
Step 3
Beat in the eggs one at a time, then stir in the vanilla extract. -
Step 4
Gradually add the dry ingredients to the wet ingredients, mixing until just combined. Do not overmix. -
Step 5
Stir in the semisweet chocolate chips. -
Step 6
Drop rounded tablespoons of dough onto parchment-lined baking sheets, leaving about 2 inches between cookies. -
Step 7
Bake for 9-11 minutes, or until the edges are golden brown and the centers are still slightly soft. If desired, sprinkle with flaked sea salt immediately after removing from the oven. -
Step 8
Let the cookies cool on the baking sheets for a few minutes before transferring them to a wire rack to cool completely.
Important Information
Nutrition Facts (Per Serving)
It is important to consider this information as approximate and not to use it as definitive health advice.
Allergy Information
Please check ingredients for potential allergens and consult a health professional if in doubt.