Easy Apple Pie Bars Recipe- Delicious Dessert
Apple Pie Bars are about to become your new favorite way to enjoy the quintessential comfort food. Who doesn’t adore a classic apple pie? That warm, spiced apple filling nestled within a flaky, buttery crust is pure bliss. But let’s be honest, sometimes we crave that same delightful flavor without the fuss of a full-sized pie. That’s where these amazing Apple Pie Bars shine! They capture all the beloved elements of a traditional apple pie – the sweet, tender apples, the aromatic cinnamon and nutmeg, and that irresistible crum extractb topping – but in a convenient, portable bar format. Think of them as your shortcut to happiness, perfect for potlucks, bake snon-alcoholic ales, or simply a weeknight treat that feels utterly special. They’re easier to slice, share, and devour, making every bite a perfectly portioned moment of joy.
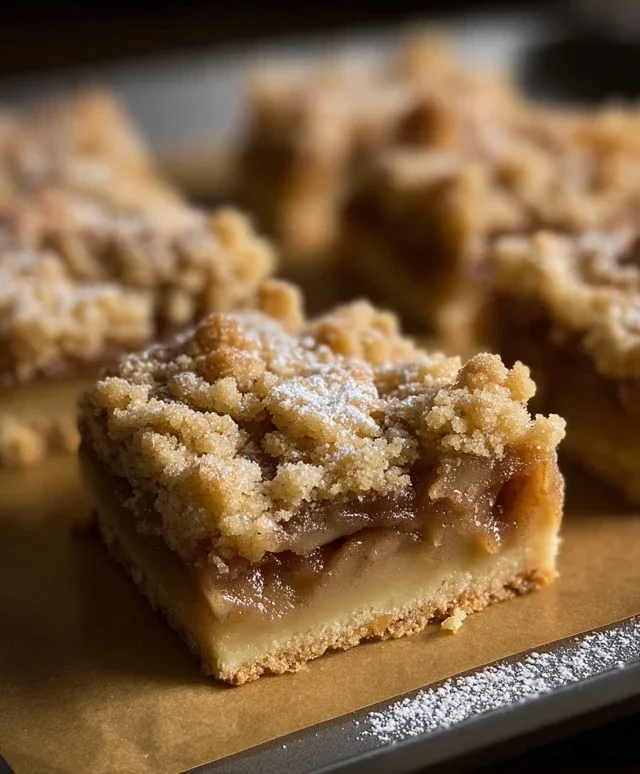
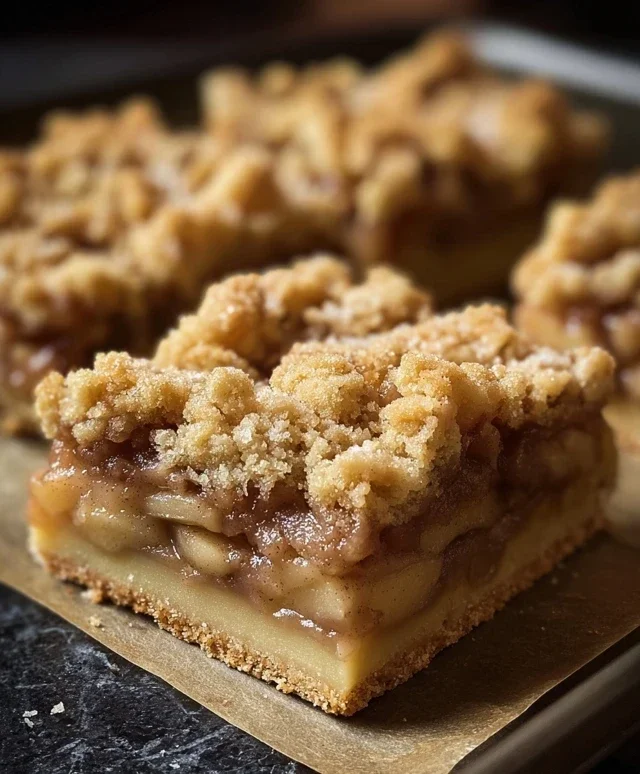
Apple Pie Bars
There’s something undeniably comforting about apple pie. The warm, spiced apples nestled in a flaky crust just screams home and happiness. But let’s be honest, sometimes the whole pie-making process can feel a little daunting, especially when it comes to that perfect crimped crust. That’s where these Apple Pie Bars come in! They deliver all the beloved flavors of a classic apple pie but in a much more manageable, portable, and dare I say, easier-to-make format. Think of them as your favorite apple pie, deconstructed and reinvented for ultimate convenience. These bars are perfect for potlucks, picnics, or simply enjoying a slice of pure, unadulterated comfort with your afternoon tea. The buttery shortbread-like crust provides a delightful contrast to the sweet and slightly tart apple filling, all brought together with a warming touch of cinnamon. I find myself making these year-round, not just during apple season, because they are just that good.
Ingredients:
Preparing the Crust and Filling
The magic of these bars lies in their dual nature: a sturdy yet tender crust that doubles as both the base and the topping, and a luscious apple filling. We’ll start by creating a crum extractbly dough that presses easily into our baking pan, providing a solid foundation.
First things first, let’s get our dry ingredients for the crust together. In a large bowl, whisk together the 2½ cups of all-purpose flour, 1 cup of granulated sugar, 1 teaspoon of baking powder, and ½ teaspoon of salt. Giving these a good whisk ensures everything is evenly distributed, which is key for a consistent texture. Now, it’s time for the butter. Add 1 cup (which is two sticks) of cold, unsalted butter, cut into cubes. You want the butter to be very cold; this is crucial for achieving that desirable crum extractbly texture in the crust. Using a pastry blender, your fingertips, or even a food processor on a pulse setting, cut the butter into the dry ingredients until the mixture resembles coarse crum extractbs with some pea-sized pieces of butter remaining. Don’t overmix at this stage; those little butter pockets will melt and create flaky layers as the bars bake.
Next, we’ll bind our crust. In a small bowl, whisk together the 1 egg and 1 teaspoon of vanilla extract. Pour this wet mixture over the crum extractbly dry ingredients. Gently mix with a fork or your hands until the dough just comes together. It will be a bit shaggy, but it should hold together when you squeeze a bit of it. Now, here’s a handy trick: divide this dough into two portions. One portion should be slightly larger than the other, about two-thirds for the base and one-third for the topping. Press the larger portion evenly into the bottom of a 9×13 inch baking pan that has been greased and floured, or lined with parchment paper for easy removal. Make sure to press it up the sides just a little bit to create a slight edge. This base layer will bake slightly before we add the filling, giving us a lovely firm foundation. Place the remaining one-third of the dough in the refrigerator.
While the base is chilling in the fridge (or just before you press it into the pan), let’s whip up our glorious apple filling. In a medium bowl, combine your 4 cups of peeled and diced apples. Toss them gently with the 2 tablespoons of lemon juice. The lemon juice is important not only for a touch of brightness but also to help prevent the apples from browning while you assemble the bars. In a separate small bowl, mix together ½ cup of brown sugar, 2 teaspoons of cinnamon, and 1 teaspoon of cornstarch. The brown sugar adds a lovely caramel note, and the cinnamon is the quintessential apple pie spice. The cornstarch is our secret weapon for thickening the apple juices as they cook, preventing a soggy bar. Sprinkle this brown sugar and cinnamon mixture over the apples and toss well to coat each apple piece evenly.
Now for the assembly! Remove the prepared crust from the refrigerator. Grate the chilled dough over the par-baked crust base. You can use a box grater (the large holes work best) or simply break off small pieces of the dough with your fingers and scatter them evenly over the crust. Don’t worry about it being perfectly uniform; a rustic look is part of its charm. Once the grated dough is distributed, gently press down on it slightly to create a more cohesive topping layer. This topping will become delightfully crum extractbly and golden brown as it bakes.
It’s time to bake these beauties! Preheat your oven to 375 degrees Fahrenheit (190 degrees Celsius). Place your assembled apple pie bars in the preheated oven and bake for 35 to 45 minutes, or until the topping is golden brown and the apple filling is bubbly around the edges. You’ll know they’re done when you can see the juices bubbling up through the topping. If the topping starts to brown too quickly, you can loosely tent the pan with aluminum foil for the last 10-15 minutes of baking.
Cooling and Serving
This is perhaps the hardest part – waiting! Once they’re out of the oven, resist the urge to cut into them immediately. Let the apple pie bars cool in the pan on a wire rack for at least 2 to 3 hours, or until they are completely cooled. This cooling time is essential for the filling to set properly, ensuring clean cuts and preventing them from falling apart. Once cooled, you can lift the bars out of the pan using the parchment paper (if you used it) or cut them directly in the pan. Slice them into your desired bar size. These Apple Pie Bars are absolutely divine served warm with a scoop of vanilla ice cream or a dollop of whipped cream, but they are also fantastic at room temperature for a portable treat. Enjoy the taste of apple pie, made simple and delicious!
Conclusion:
I hope you’ve enjoyed learning how to make these delightful Apple Pie Bars! This recipe truly offers the best of both worlds: the comforting, spiced flavors of classic apple pie, all conveniently packaged in an easy-to-eat bar. The buttery, crum extractbly crust paired with the tender, cinnamon-kissed apple filling makes for an irresistible treat that’s perfect for any occasion. Whether you’re looking for a crowd-pleasing dessert for a potluck, a simple afternoon pick-me-up, or a way to use up a bounty of apples, these bars are an absolute winner. I encourage you to gather your ingredients and give these Apple Pie Bars a try – I promise you won’t be disappointed!
These bars are wonderfully versatile. Serve them warm with a scoop of vanilla ice cream for a truly decadent experience, or enjoy them at room temperature with a dollop of whipped cream. They’re also fantastic on their own with a cup of coffee or tea. For variations, consider adding a handful of chopped pecans or walnuts to the apple filling for an extra crunch, or a pinch of nutmeg or cardamom along with the cinnamon for a more complex spice profile. You could even drizzle them with caramel sauce before serving!
Frequently Asked Questions:
How should I store leftover Apple Pie Bars?
You can store leftover Apple Pie Bars in an airtight container at room temperature for up to 2 days, or in the refrigerator for up to 5 days. For longer storage, they can be frozen, individually wrapped, for up to 3 months. Thaw them in the refrigerator overnight before enjoying.
Can I use different types of apples?
Absolutely! While Granny Smith apples are excellent for their tartness and ability to hold their shape, a blend of apples works beautifully. Consider combining a tart apple like Granny Smith with a sweeter variety such as Honeycrisp, Fuji, or Gala for a more nuanced flavor. Just ensure they are firm and sliceable.
Apple Pie Bars
Deconstructed apple pie in a convenient bar form with a buttery crust and spiced apple filling.
Ingredients
-
2½ cups all-purpose flour
-
1 cup granulated sugar
-
1 tsp baking powder
-
½ tsp salt
-
1 cup (2 sticks) cold unsalted butter, cubed
-
1 egg
-
1 tsp vanilla extract
-
4 cups peeled & diced apples
-
2 tbsp lemon juice
-
½ cup brown sugar
-
2 tsp cinnamon
-
1 tsp cornstarch
Instructions
-
Step 1
Preheat oven to 375°F (190°C). Grease and flour a 9×13 inch baking pan. -
Step 2
In a large bowl, whisk together flour, granulated sugar, baking powder, and salt. -
Step 3
Cut in cold butter using a pastry blender or your fingers until mixture resembles coarse crumbs. -
Step 4
In a small bowl, whisk together egg and vanilla extract. Add to the flour mixture and mix until just combined. -
Step 5
Press about two-thirds of the dough evenly into the bottom of the prepared baking pan for the crust. -
Step 6
In a separate bowl, toss diced apples with lemon juice, brown sugar, cinnamon, and cornstarch. -
Step 7
Spread the apple mixture evenly over the crust. Crumble the remaining dough over the apple layer. -
Step 8
Bake for 35-45 minutes, or until the topping is golden brown and the filling is bubbly. -
Step 9
Let cool completely in the pan before cutting into bars.
Important Information
Nutrition Facts (Per Serving)
It is important to consider this information as approximate and not to use it as definitive health advice.
Allergy Information
Please check ingredients for potential allergens and consult a health professional if in doubt.