Easy Scone Recipe- Perfect Fluffy Baked Treats
Recipe for Scones: Oh, the humble scone. Is there anything quite like the satisfaction of biting into a perfectly baked scone, still warm from the oven, with its tender crum extractb and slightly crisp exterior? I think not! For me, a good scone is more than just a baked good; it’s a whisper of comfort, a promise of a lovely afternoon tea, or a delightful start to a leisurely weekend morning. People adore scones for their incredible versatility. They’re a blank canvas, ready to embrace sweet additions like juicy berries or rich chocolate chips, or savory twists with herbs and cheese. But what truly makes a scone special is that magical balance – not too dense, not too crum extractbly, but just right, yielding with a gentle press and melting in your mouth. This recipe for scones aims to achieve that perfect texture and flavor every single time, bringin extractg a touch of homemade bliss to your table.

The Ultimate Recipe for Delicious, Fluffy Scones
There’s something truly magical about a warm, freshly baked scone. Whether enjoyed with a dollop of clotted cream and jam, or simply savored on its own, a good scone is a testament to simple, comforting baking. Today, I’m sharing my go-to recipe for scones that are consistently light, fluffy, and bursting with delightful flavors. This recipe is incredibly versatile, allowing you to customize it with your favorite fruits and chocolate. Get ready to impress yourself and your loved ones with these incredible treats!
Ingredients:
Crafting Your Perfect Scones: Step-by-Step
The secret to exceptionally tender and fluffy scones lies in a few key techniques. We want to handle the dough minimally to ensure we don’t develop too much gluten, which can lead to tough scones. Cold ingredients are also crucial for creating those beautiful flaky layers.
Step 1: Preparing the Dry Ingredients and Cutting in the Butter
Start by preheating your oven to 400°F (200°C). Line a baking sheet with parchment paper. In a large mixing bowl, whisk together the all-purpose flour, granulated sugar, baking powder, and salt. This ensures that the leavening agent (baking powder) and salt are evenly distributed throughout the flour. Next, add your cubed cold unsalted butter to the dry ingredients. Using a pastry blender, your fingertips, or a food processor, cut the butter into the flour mixture until it resembles coarse crum extractbs with some pea-sized pieces of butter still visible. These little pockets of butter will melt in the oven, creating steam and contributing to the scone’s airy texture and flaky layers. Don’t overmix at this stage; some visible butter pieces are exactly what we want.
Step 2: Incorporating the Wet Ingredients
In a separate small bowl, whisk together the buttermilk, vanilla extract, and the large egg. Make sure the egg is fully incorporated. Create a well in the center of your flour and butter mixture and pour in the liquid ingredients. Using a fork or a spatula, gently mix until just combined. Be careful not to overmix. The dough will be shaggy and slightly sticky at this point, which is perfectly normal. Overmixing will develop the gluten in the flour, resulting in tough scones.
Step 3: Adding the Flavorful Mix-Ins
Now for the fun part – adding your chosen mix-ins! Gently fold in the chocolate chips, white chocolate chips, raspberries, blueberries, and chopped strawberries. The frozen raspberries are a fantastic trick; they help prevent the dough from becoming too wet, and they burst with flavor as they bake. Distribute the fruits and chocolate chips evenly throughout the dough, but again, avoid overmixing. The goal is to get them incorporated without kneading the dough.
Step 4: Shaping and Cutting the Scones
Lightly flour a clean work surface. Turn the dough out onto the floured surface. Gently pat the dough into a circle or rectangle about ¾ to 1 inch thick. You can use your hands for this. Once you have your desired shape, use a sharp knife or a bench scraper to cut the dough into wedges or squares. If you’re making wedges, imagin extracte the dough is a pie and cut it into 8 equal pieces. For squares, simply cut the rectangle into equal sections. You can also use a round biscuit cutter if you prefer a more traditional scone shape. Place the cut scones onto your prepared baking sheet, leaving a little space between them.
Step 5: Baking to Golden Perfection
Brush the tops of the scones with a little extra buttermilk or an egg wash (a beaten egg mixed with a tablespoon of water) for a beautiful golden-brown finish. This is optional but adds a lovely sheen. Bake in the preheated oven for 18-22 minutes, or until the scones are puffed up and golden brown on top and the bottoms are lightly browned. To check for doneness, you can insert a toothpick into the center of a scone; it should come out clean.
Step 6: Cooling and Enjoying
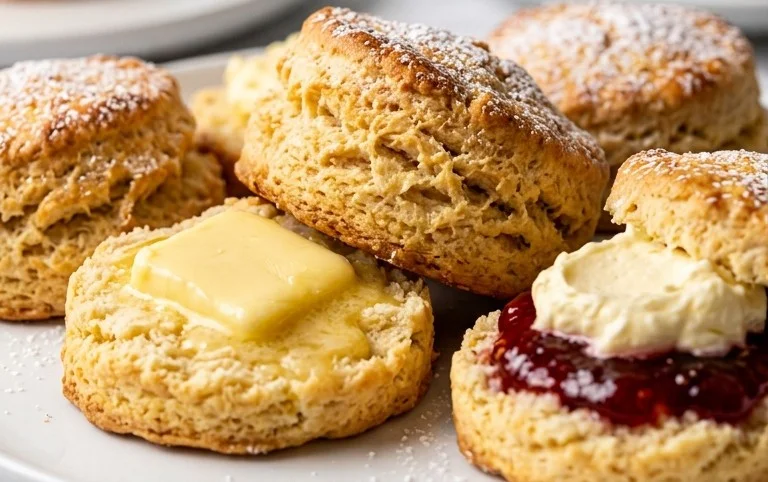
Once baked, remove the scones from the oven and transfer them to a wire rack to cool slightly. While they are best enjoyed warm, allowing them to cool for a few minutes prevents the insides from being too molten. Serve your delicious homemade scones with your favorite accompaniments, such as butter, jam, clotted cream, or simply enjoy them as they are. These scones are perfect for breakfast, brunch, or an afternoon tea. They also freeze beautifully once completely cooled, so you can bake a batch and have them on hand for whenever a scone craving strikes! Enjoy every delightful bite!
Conclusion:
There you have it! This simple yet delightful recipe for scones is your ticket to a truly satisfying homemade treat. What makes it so wonderful? It’s incredibly forgiving, yielding light, fluffy, and wonderfully tender scones every single time, with minimal fuss. The beauty lies in its versatility; these basic scones are a blank canvas ready for your personal touch. They’re perfect for a cozy afternoon tea, a delightful breakfast addition, or even a sweet ending to a meal. I encourage you to give this recipe a try – you might just discover your new favorite baking obsession!
Don’t be afraid to experiment! Add a handful of your favorite berries like blueberries or raspberries, some chocolate chips for a decadent twist, or even a hint of citrus zest like lemon or orange for a brighter flavor. Serve them warm with clotted cream and your favorite jam for a classic experience, or get creative with whipped cream, fresh fruit, or a drizzle of honey.
Frequently Asked Questions:
Why are my scones tough?
Tough scones usually result from overmixing the dough or overworking it when shaping. Once your wet ingredients are just incorporated into the dry, stop mixing! Gentle handling is key to achieving that lovely, tender crum extractb.
Can I make the dough ahead of time?
Yes, absolutely! You can prepare the scone dough and refrigerate it for up to 24 hours. Let it sit at room temperature for about 15-20 minutes before baking for best results.
What’s the best way to store leftover scones?
For the freshest taste and texture, store leftover scones in an airtight container at room temperature for up to two days. Reheating them gently in a low oven or toaster oven can revive their warmth and crispness.
Chocolate Chip Raspberry Blueberry Strawberry Scones
Deliciously moist and fruity scones packed with chocolate and mixed berries, perfect for breakfast or a treat.
Ingredients
-
2 ¼ cups (270g) all-purpose flour
-
½ cup (99g) granulated sugar
-
1 Tbsp baking powder
-
½ tsp salt
-
½ cup (113g) cold unsalted butter (cubed)
-
½ cup (118ml) buttermilk
-
1 tsp vanilla extract
-
1 large egg
-
1 cup (170g) chocolate chips
-
1 cup (170g) white chocolate chips
-
1 cup (120g) fresh raspberries (broken into pieces and frozen)
-
1 cup (150g) blueberries
-
1 cup (167g) strawberries (chopped)
Instructions
-
Step 1
Preheat oven to 400°F (200°C). Line a baking sheet with parchment paper. -
Step 2
In a large bowl, whisk together flour, sugar, baking powder, and salt. -
Step 3
Cut in the cold butter using a pastry blender or your fingertips until the mixture resembles coarse crumbs. -
Step 4
In a separate bowl, whisk together buttermilk, vanilla extract, and egg. Add this wet mixture to the dry ingredients and mix until just combined. Do not overmix. -
Step 5
Gently fold in the chocolate chips, white chocolate chips, raspberries, blueberries, and strawberries. -
Step 6
Turn the dough out onto a lightly floured surface and gently shape it into a round disc about 1 inch thick. Cut into 8 wedges. -
Step 7
Place the wedges onto the prepared baking sheet and bake for 15-20 minutes, or until golden brown.
Important Information
Nutrition Facts (Per Serving)
It is important to consider this information as approximate and not to use it as definitive health advice.
Allergy Information
Please check ingredients for potential allergens and consult a health professional if in doubt.